5 Effortless Ways to Fix USB Device Not Recognized Error
“USB Device not recognized” is a message you might have encountered once in a while when you plug in a peripheral device to your system. If anything of such sort happens, you take it out and plug in again.
The problem is seen no more most of the times. But sometimes the issue stays. So you need to know what is actually meant by the warning “USB Device not recognized”. Basically, there are USB ports for a system. You might also attach a USB hub to one of these ports so as to add extra components to your system.
As said earlier, most of the times this setup works properly, but occasionally your computer may stop recognizing the USB devices. However, the odd thing is that (which perhaps many of you might have noticed) is that any mobile connected to the port still gets charged even though the device is not being recognized. On the other hand the, camera could not be recognized by using the same port.
Here are the possible fixes which you might try to resolve the USB Device Not Recognized issue
Table of Contents
1. Unplug the computer and start afresh:
If even after unplugging the device from the USB port and then plugging it again does not work, you can try unplugging the computer system. Just switch off the power supply. The motherboard of the CPU is the place where all the hardware is connected, including the devices connected to USB ports.
So, sometimes the motherboard might need some rebooting as some things might go wrong due to unwanted delays in the registers. These issues may include the break in working of the USB ports. On rebooting the system, the small microprocessor hopefully recognizes the devices connected to your USB ports by reloading the drivers.
2. Change the power management setting for the USB Root Hub:
For this follow the given steps:
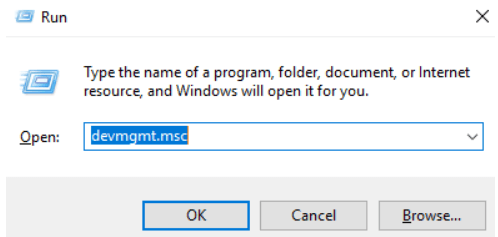
- On your keyboard, press the Windows key and R at the same time. Type devmgmt.mc and then press Enter.
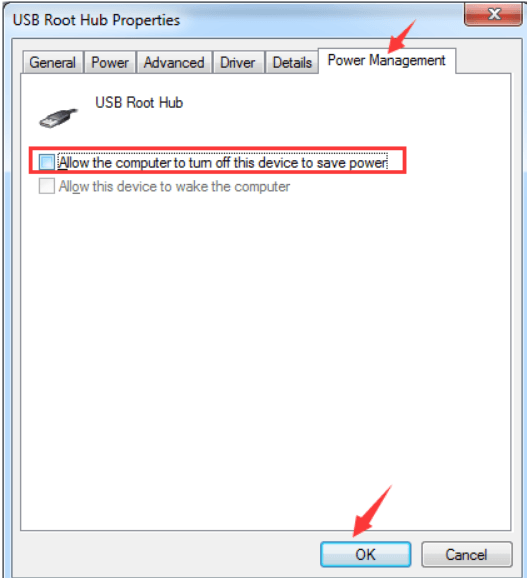
- Click the arrow pointing downwards to expand the Universal Bus Controllers menu. Right-click USB Root Hub option and click properties.
- Then go to the Power Management tab and uncheck the Allow the computer to turn off this device to save power. Click OK.
- If you have more than one USB Root Hubs, you will have to repeat the above step a couple of times. But do remember to click OK after you are done with each port.
- After making all such changes in the settings, plug your device back into the system through the USB port. Now check if your system recognizes it. Note that if your USB port still doesn’t work, you need to check the “Allow the computer to turn off this device to save power” option which you earlier unchecked for serving the purpose.
Also, Check Out –
3. Update the USB port Driver:
It is very probable that if the basic procedures do not help, then there is something wrong in the driver that is driving the USB port. So, there are two ways to update your driver: Manually and automatically.
- Manual driver update:
The USB port driver can be updated manually. You can do this by going to the official website of your PC. There you need to search for the latest version of the driver that you are looking for updating. You should look to it that you pick up the driver that is compatible with the Windows OS version that you have in your system.
- Automatic Driver Update:
If you do not have the patience to deal with the issue manually, you can go for setting up the automatic procedure. This is done by “Driver Easy”. Driver Easy acts as a very cool assistant. It automatically recognizes the features of your system. Then it finds the correct drivers apt for your system. You don’t have to know all the details of your system and the other perks of it. You don’t even have to risk the downloading of wrong drivers. The Driver easy will automatically do it for you.
- Download and install Driver Easy.
- Run Driver Easy and Click the Scan Now Button. Driver Easy thus starts its work. It scans your system and detects the problems if any in your driver.
- Click the Update button next to any flagged drivers to automatically download and install the correct version of the driver that you need.
- You can also click on Update All to automatically update and install the correct version of all the drivers that are outdated or missing from your system.
4. USB Troubleshooter:
You can download the Windows USB Troubleshooter Fixit tool if nothing works and you can’t get your USB device recognized. It is a tool which comes at absolutely no cost. It works with Windows XP, Vista, and Windows 7.
This is a neat option as it does everything automatically for you- from detecting the issues to fixing the problems.
5. Update Generic USB Hub:
If you are constantly getting Unknown Device error in the Device Manager, then you also have another option. Just follow the given steps:
- Open Device Manager and then expand Universal Serial Bus Controllers.
- You should check out the different options that you get here as these might be of help later on.
- When the Update dialogue box pops up, select the “Browse my computer for driver software” option.
- Then select the option “Let me pick from a list of device drivers on my computer” at the bottom.
- Click on “Next” and then click “Close”.
After doing this screen should be refreshed and the unknown device will be recognized.
If not then you have to again go to the Generic USB list and repeat the steps for other items.
End Of The Line –
So This was the list of methods you can use to fix the USB device not recognized error in your Windows PC.
We have tried our level best to make the tutorial as lucid as we could. Follow the simple steps listed above to fix the issue.
If you have any query, do let us know in the comment section.
Regards