Lucid Tutorial To Use DirectX Diagnostic Tool In Windows
Let us first brief us about the DirectX Diagnostic Tool following the Tools that are used. Microsoft DirectX is a collection of application programming interfaces that manage tasks on Windows-based computers such as handling multimedia, game programming, and video. It can do this on all the Microsoft platforms.
Thus it is very important that the application works efficiently for the trouble-free working of your computer.
So for this, we have DirectX diagnostic tools which assist in troubleshooting. In cases when you have trouble playing a movie or loading a video game this tool comes in handy.
We would be happier if you check out Antimalware Service executable (MsMpEng.exe) FIX.
Following Are The Steps For Troubleshooting Using DirectX Diagnostic Tool:
Table of Contents
1.Finding out the DirectX Diagnostic Tool
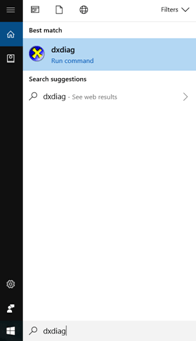
The process is different in different operating systems. Let us start with the latest Windows that is Windows 10. For this go to the search option of Cortana and type ‘dxdiag’.Now tap on the dxdiag.
For Windows 7 it can be found at the location “C:\Windows\System32\dxdiag.exe”.
All of the windows operating system allow you to start this diagnostic tool with the help of Run Window.
#2. Checking of the digital signing of the drivers:
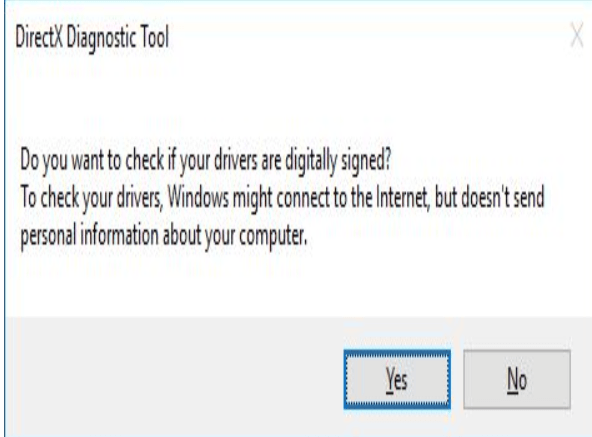
If you are opening the diagnostic tool for the first time, then a window pops up with a question in it. It asks if the drivers are digitally signed and that it would need an internet connection but it won’t share any of the personal or private information on the computer with the web.
It actually checks if the drivers are digitally signed in by Microsoft and approved by Microsoft’s Windows Hardware Quality Labs. Pressing yes on this pop-up would be the best option.
#3. Knowing all about the tool tabs:
Once the starting procedure finishes, you will soon come across the DirectX Diagnostic Tool Window. Now, this window has mainly four tabs which include System, Display, Sound, and Input. The sound could further be divided into Sound1, Sound2, and so on in some cases. Same can be the case with the other three. This is mainly because of the reason that the DirectX Diagnostic tool found more than one driver for a particular function.
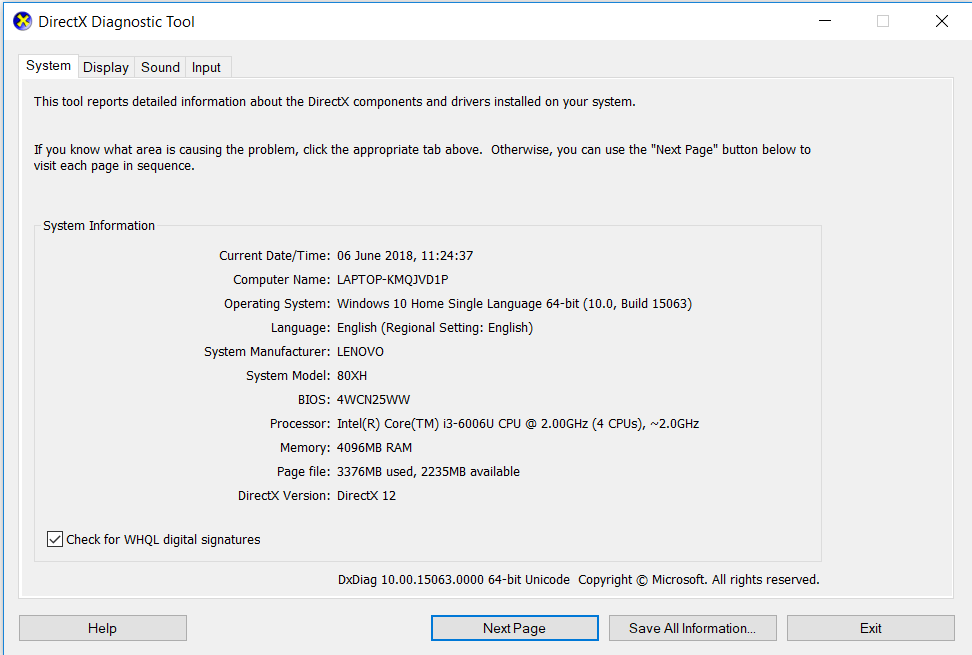
#4.General System Information:
This system information can be very easily seen under the System Tab. It shows the basic information of your device like the name of the computer, the version of the Operating System involved, the language, model manufacturer, the processor, information about the used and unused RAM regarding the page file and the version of DirectX installed.
You also have the option of saving all of this information in a text file with the help of a button given at the bottom that says “Save all information…”.
There is also an additional option present in Windows 7. It says “Run 64-DxDiag”. This is because this version of the operating system has 64-bit drivers whereas DxDiag gives full information about 32-bit by default. So you need to click on this option if you are using Windows 7. In Windows 10 the checking of the 64-bit drivers is done automatically each time you start it.
Also, you will find a box with the description “check for VHQL digital signatures”. The box is usually ticked if you had pressed the Yes option earlier while checking for digital signing of the drivers.
#5.Exploring the Display option:
In this tab, you can have all the information regarding the video card and the monitor. You can find the name of the video card being used, the manufacturer, chip type, DAC type, device type, the approximate total memory, screen resolution and the detailed information of the driver working for it.
The Notes section at the bottom of the tab gives you a notification about any problems that are found. It comes in handy when there is actually a problem and you need troubleshooting.
If you find that any video or related program is running slowly or not running at all check-in this tab whether the DirectDraw, Direct3D, and AGP Texture Acceleration appear enabled. If not then you need to turn ON the Hardware Acceleration. For this:
- Right-click on the desktop and open the Screen resolution.
- Select advanced settings.
- Click the Troubleshooter tab and select the option change Settings
- Next, move the hardware acceleration slider to full.
If the other process doesn’t work, you need to update your drivers for the hardware that you are currently using. You can find the information on the manufacturer’s website. 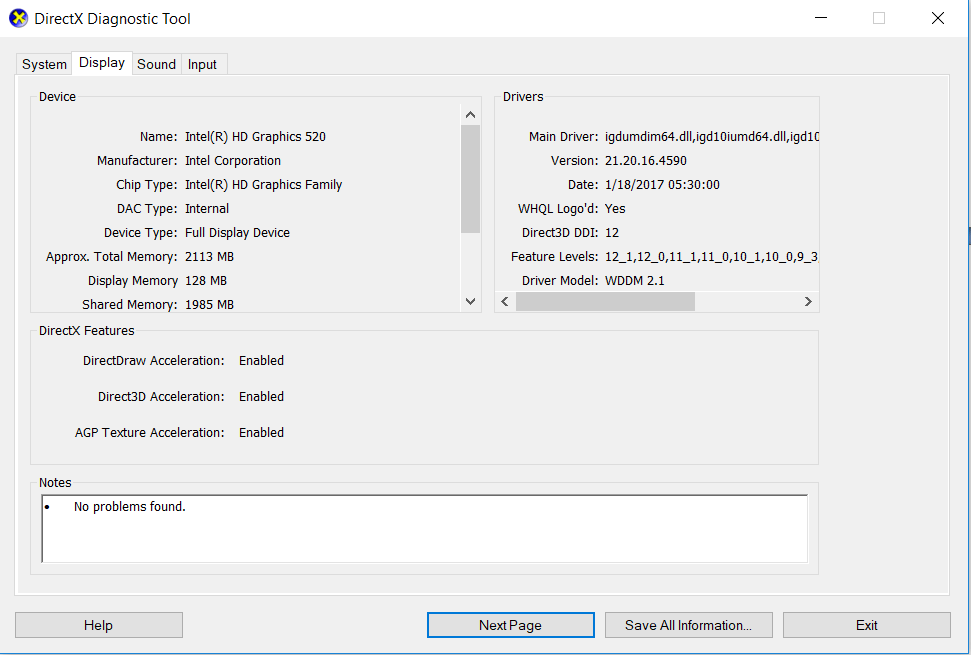
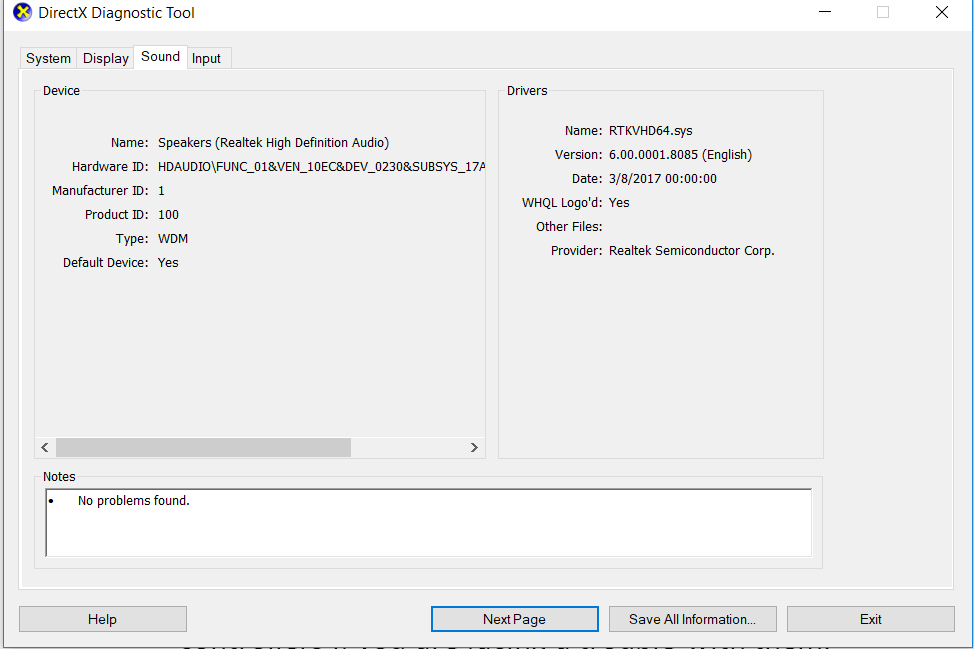
#6. System sound information:
It includes the name and manufacturer for each of the sound device involved. It has all the information associated to the drivers like the version and the date. Issues are listed in the Notes section.
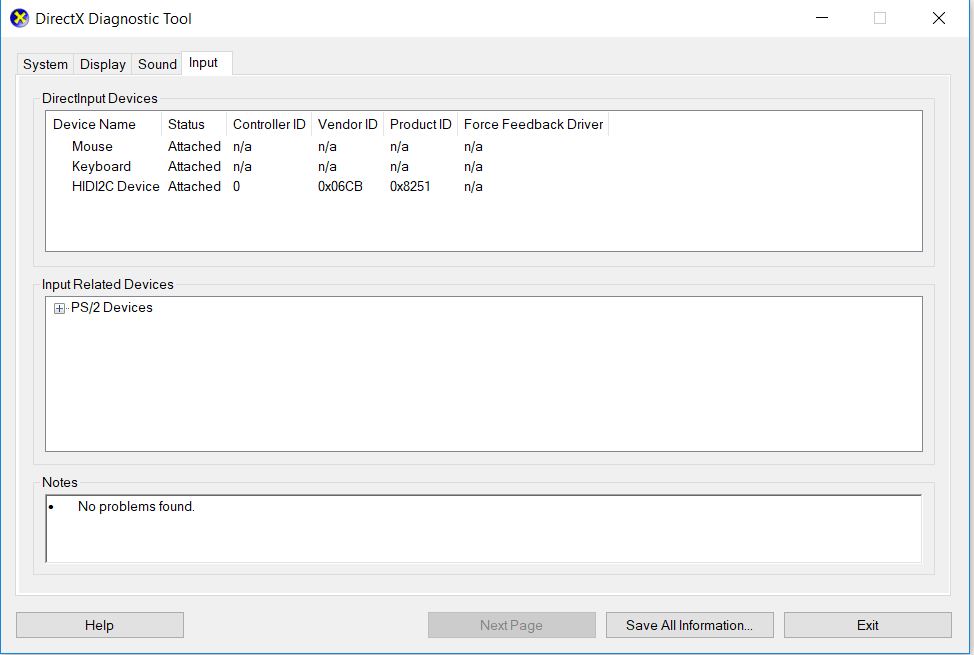
#7. System Input Information:
It shows all the input devices plugged into the computer. You can also expand each of the input devices section. Here you might check the game controllers if you are facing trouble with them. For instance, if a mouse or joystick fails to work properly, it might be due to the improper installation of the drivers managing the input device. So the device should definitely show up at this Input tab if installed properly. If it doesn’t, then you need to reinstall the device. If it is a USB device, then unplug it and then plug it again.
Further things to be checked:
- Check for unsigned drivers:
If the diagnostic tool flags an unsigned driver then you need to reinstall the respective driver. And you should go for the latest version.
- Check the display mode of the application:
If the resolution of the application doesn’t match the resolution of the monitor or the screen, you might see some black bands at the sides. You can use the full-screen option to avoid it. Otherwise, if the application gives you the option of changing the display mode, you can definitely go for it.
- Updating DirectX:
Sometimes the application that you are using is not compatible with the version of DirectX. In such a case you will get a message that particular software is missing. In such a case first, try reinstalling the application. If it doesn’t work, open this link and follow the instructions to install the new version of DirectX.
End Of The Line –
So With this, we conclude the tutorial to use DirectX Diagnostic Tool in Microsoft Windows.
And if You love this lucid tutorial check another lucid tutorial to Fix Failure Configuring Windows Updates Error.
If you faced any problem while following the steps or If you have any query. Feel free to comment and let us help you as early as possible.
Regards 😁😁😁