How To Use NordVPN On Android
If you want to set up and use NordVPN on your Android phone or tablet, this article is for you! Today I’m going to walk you through the simple steps to easily get NordVPN up and running.
I’m not going to get into what a VPN is in this article, because if you’re reading this, you probably already know. But if you do want to learn more about VPNs, check out this article.
First things first, before you can start installing it on your phone, you’ll need to sign up for an account if you don’t already have one. Don’t worry, it’s quite straightforward. Just head over to nordvpn.com, click on “get NordVPN”, and follow the prompts to sign up and create your account.
Click here to read the results of my extensive tests of NordVPN and find out just how fast it is!
How To Set Up NordVPN On Android
Table of Contents
Once you’ve got your account and saved the password somewhere safe, you can move on to actually installing it. You can set it up through the settings on your phone if you really want to, but that is quite complicated and once it’s installed you will miss out on certain features.
The best way to install NordVPN on your phone is through the official app, so that’s the way I’m going to show you today.
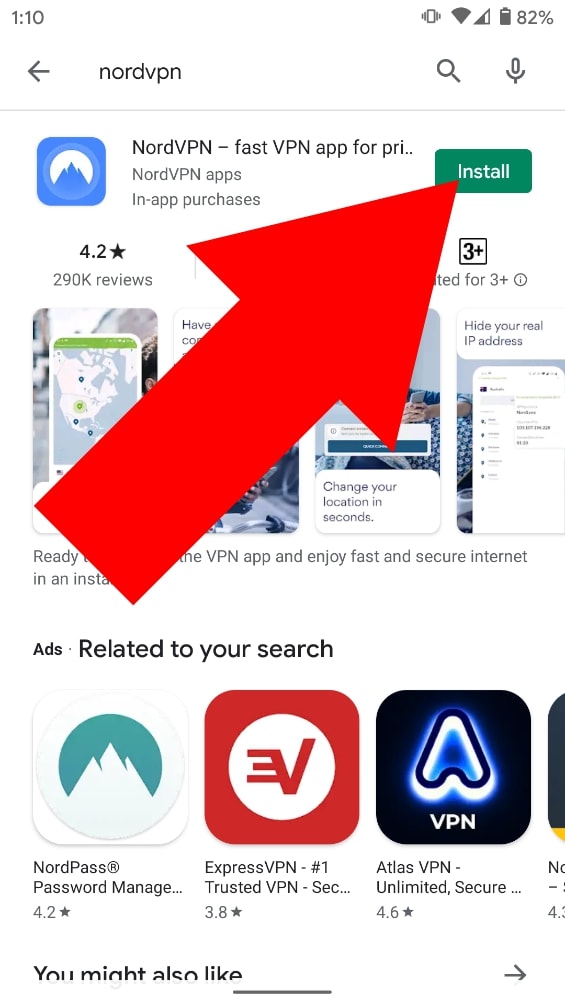
To install the NordVPN app, open up the Google Play Store on your phone and search for “NordVPN”
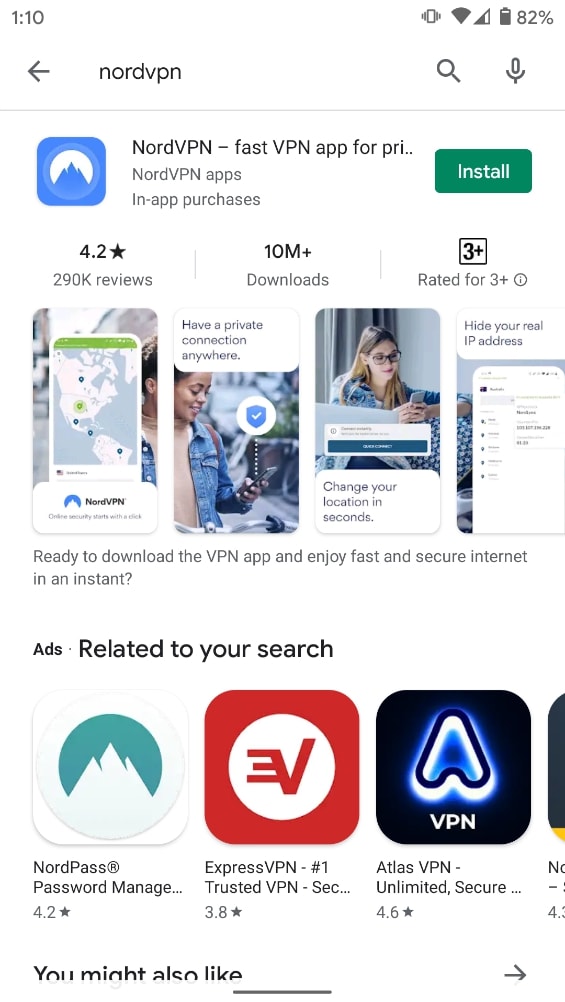
It will almost definitely be the top result in the search, so tap on “Install” and it will begin installing.
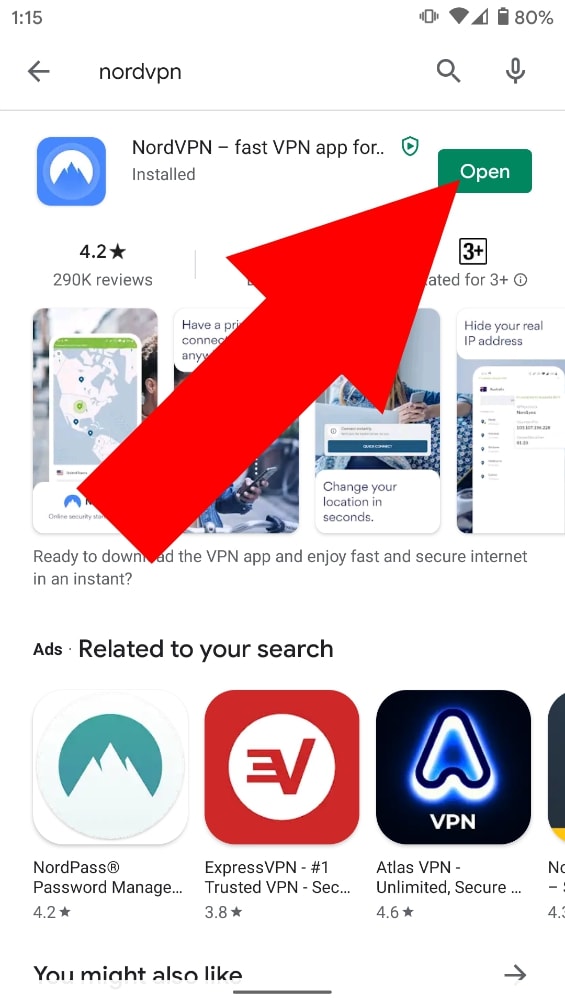
It should only take a few seconds to download and install, then once it’s done, click on “Open” to launch the app.
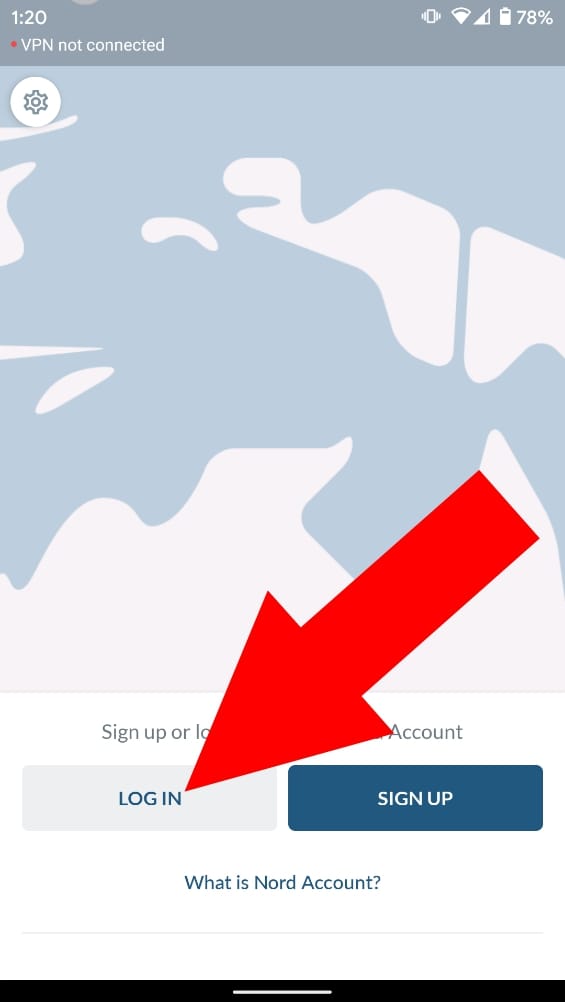
Once the app is open, you’ll see an option to “log in”, or “sign up”. As you signed up earlier (and hopefully remember your password), you will be able to choose “log in”.
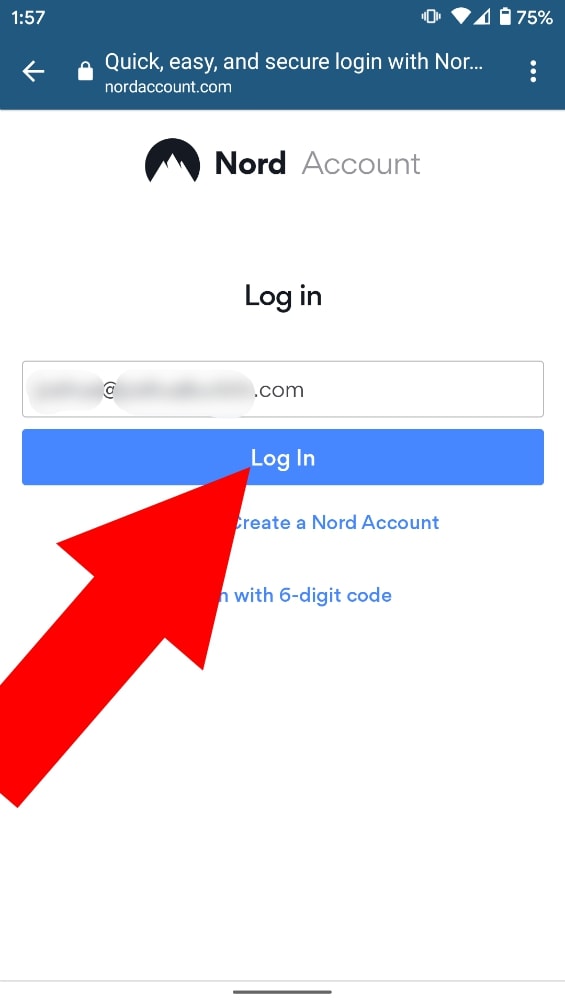
Once you click “login”, it will ask you for your username or email address. Enter the email address that you used when you signed up and then tap “Log In”.
It will then ask you for your password, so type in the password you set when you signed up and then tap “Log In”
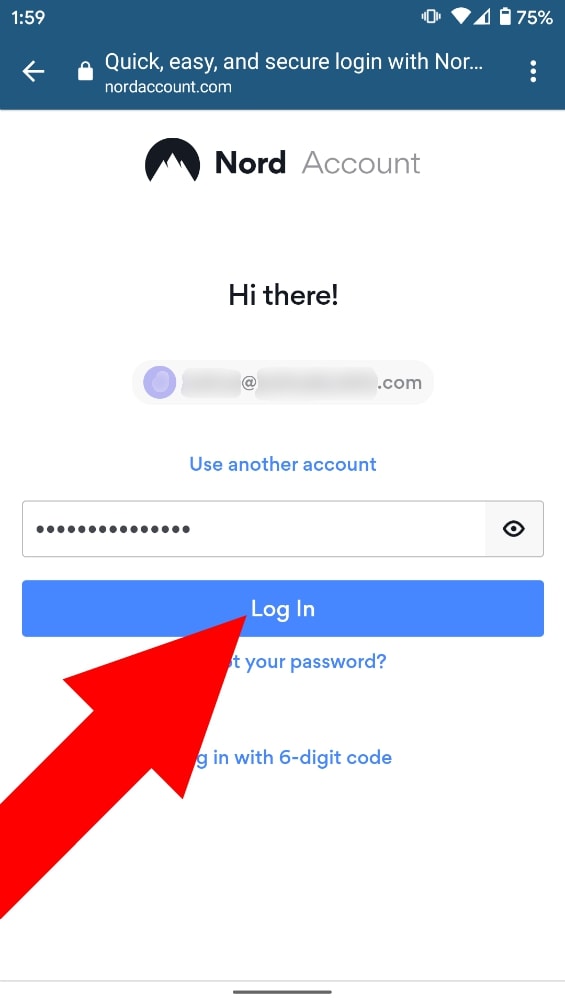
After you tap “Log In”, you should briefly see a screen that says “Logged In Successfully” and then you will be on the app’s home screen.
The first time you use NordVPN on your phone, you might need to allow the app to set up a VPN connection. This will be slightly different depending on what brand of phone you have, and you might not need to do anything at all.
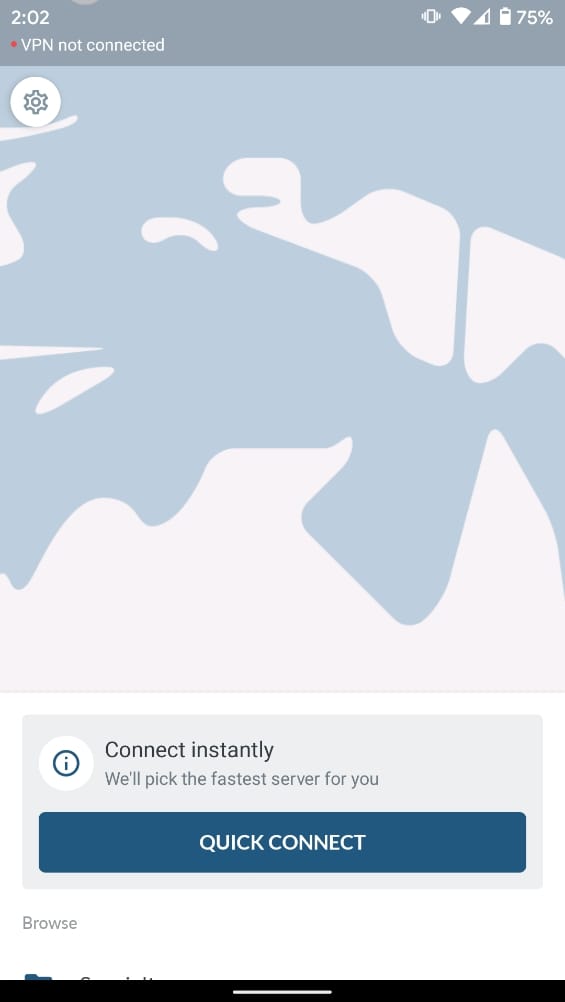
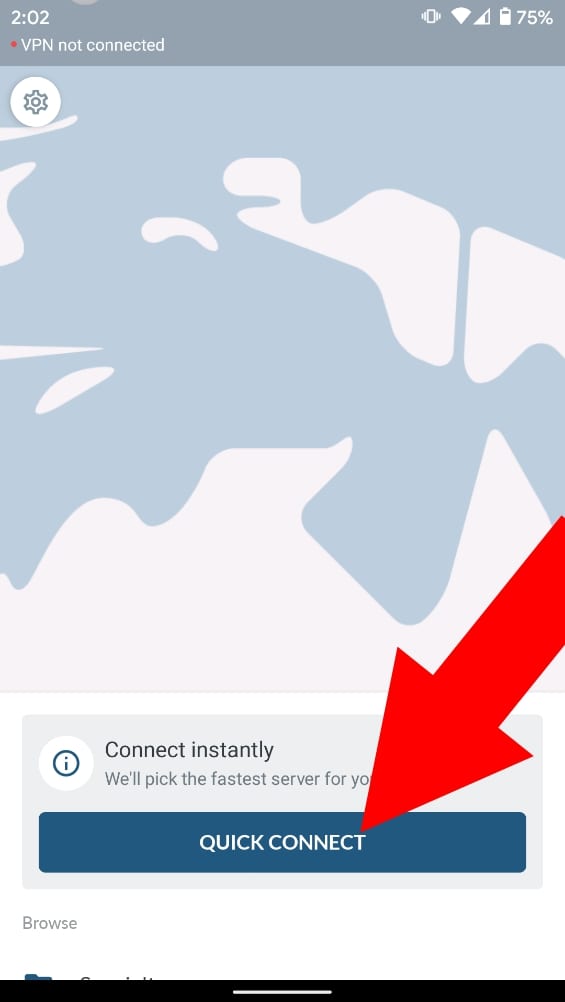
To find out if you need to allow anything, just tap on “Quick Connect” and see what happens next.
If the VPN connects straight away, there is nothing more you need to do, You’re ready to go. But chances are, you saw a popup message a bit like this:
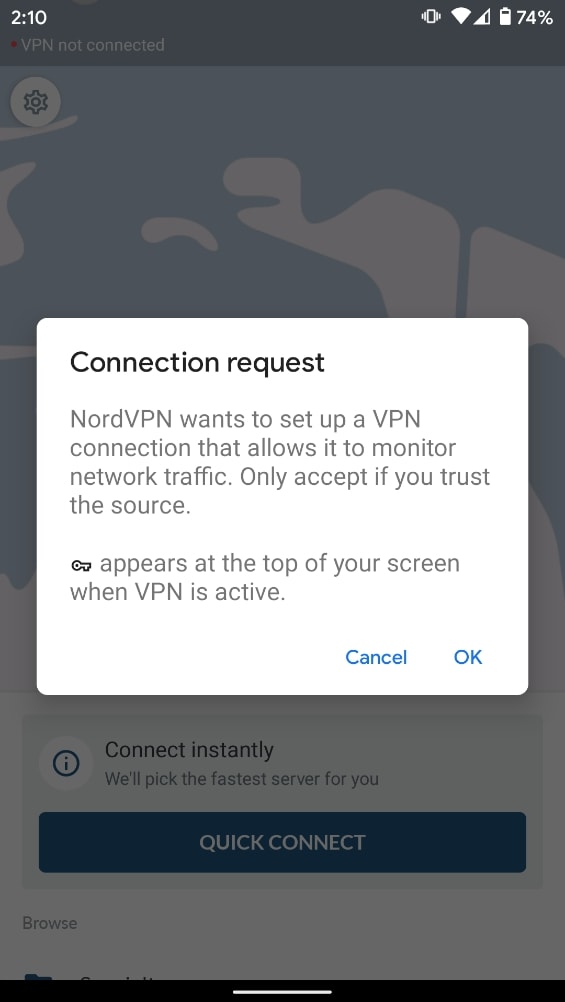
I’m using a Google Pixel so it might look slightly different depending on your phone, but there will probably be a message similar to this asking if you want to allow the NordVPN app to set up a VPN on your phone.
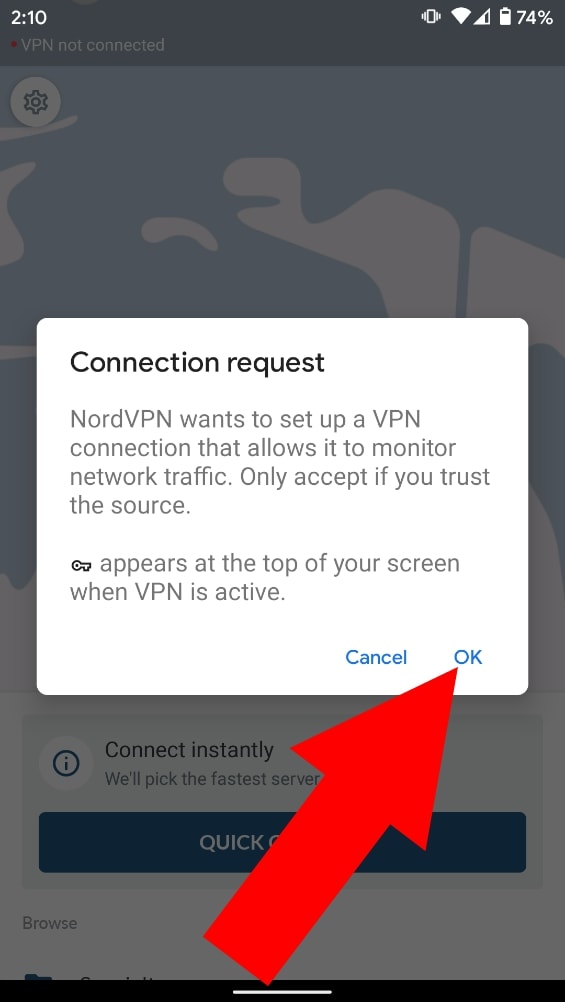
Accepting this message is the only way to proceed, so just go ahead and tap “Ok”, “Accept”, “Agree”, or anything else it might say depending on your phone.
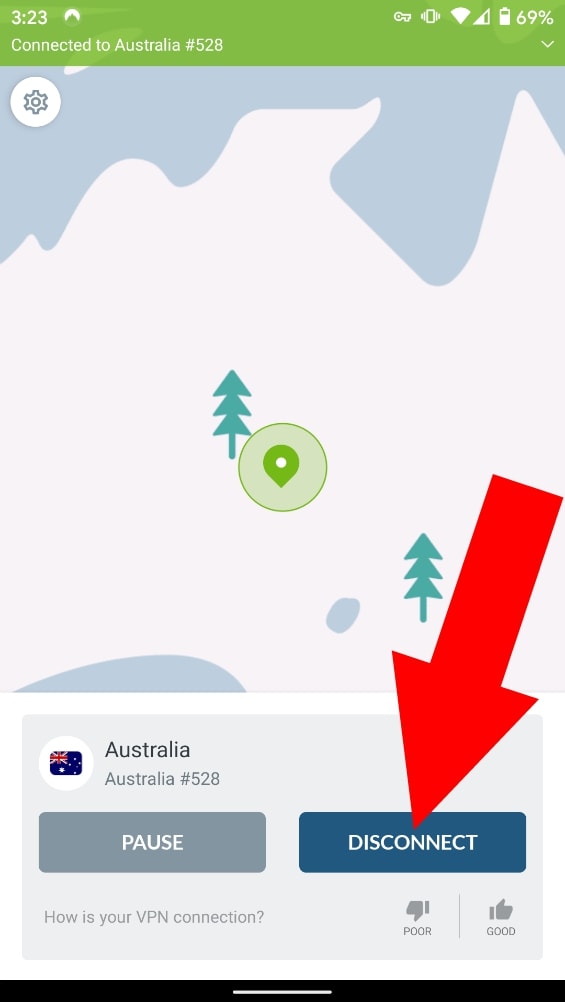
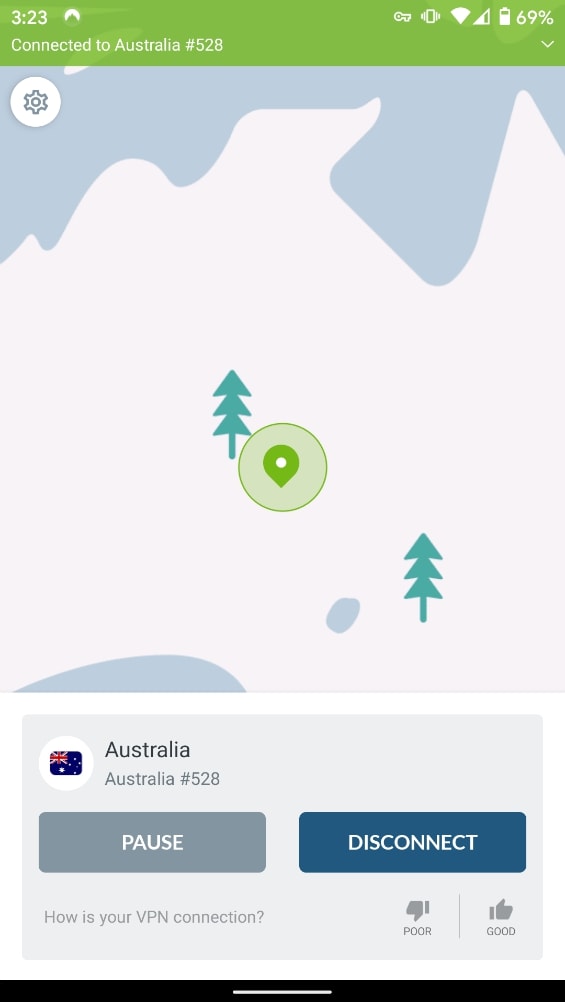
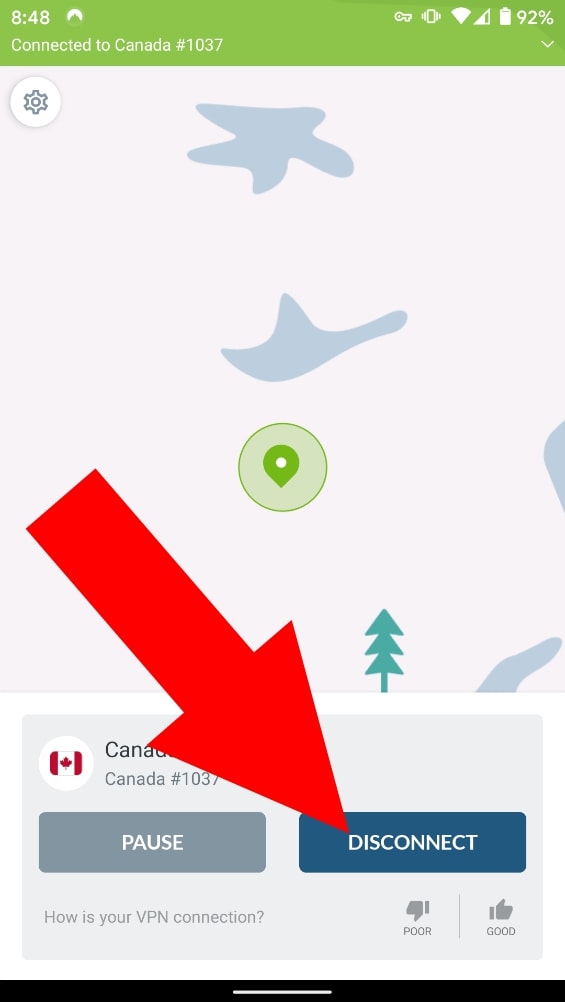
Once you allow the app to set up the VPN, you should then be automatically connected to the VPN server that is nearest to you. If at any time you want to disconnect from the VPN, just open the app and tap “Disconnect”.
How To Use NordVPN
So now that it’s all set up, you will be able to actually use it. If you just want to use the VPN server that is nearest to you so that you can have a secure and private browsing experience while still being as fast as possible, just tap on “Quick Connect”, and you will be automatically connected to the best server available.
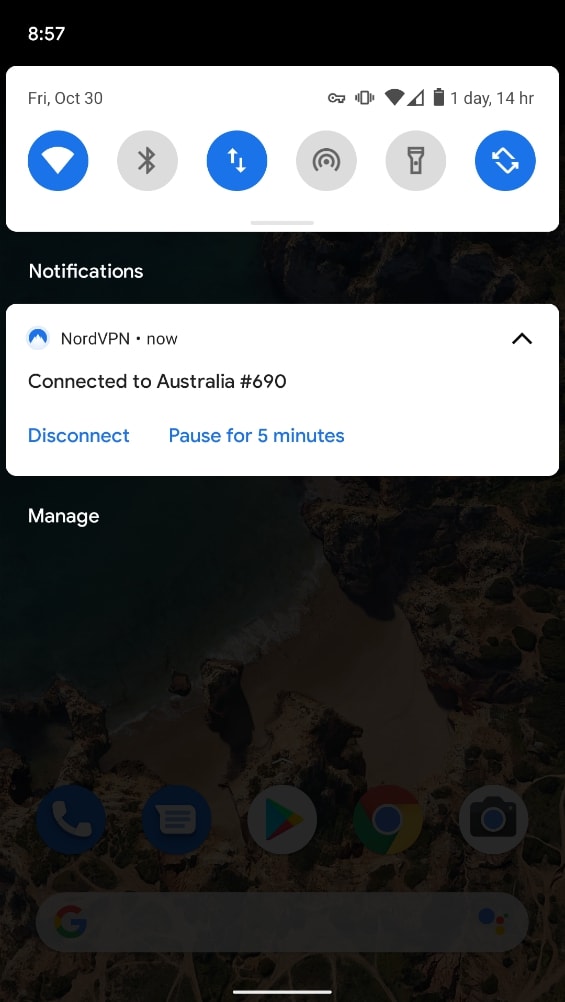
You can then leave the app, and you will now be using the VPN for anything you do online with your phone. If you pull down the notification shade on your phone, you will see a notification from NordVPN letting you know that you’re still connected.
The notification will also allow you to quickly Disconnect from the VPN by taping “Disconnect”, or Pause the VPN connection for 5 minutes by tapping “Pause for 5 minutes”. This will temporarily disconnect the VPN and then connect it again in 5 minutes which is great for when you occasionally need to do something without the VPN on.
How To Connect To A Different Country With NordVPN
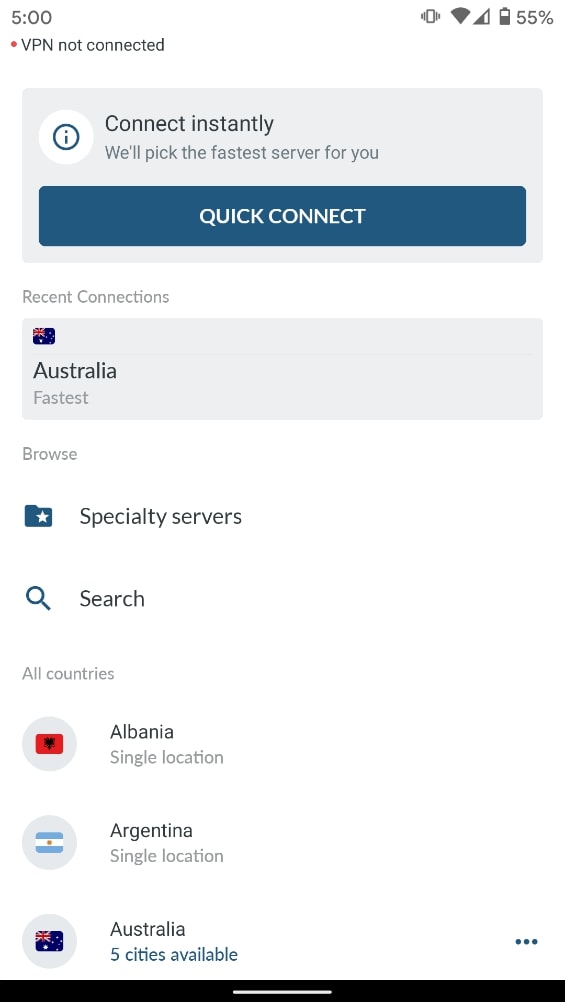
If you don’t care as much about the speed, and you want to connect to a specific country so that you can do things like streaming Netflix in other countries. You can quite easily pick any country you want.
To do this, just open the app and then slide your finger up from near the bottom of the screen to reveal the main menu. You will then be able to scroll down through a list of all the different countries and tap on anyone you want to connect to a VPN server in that country.

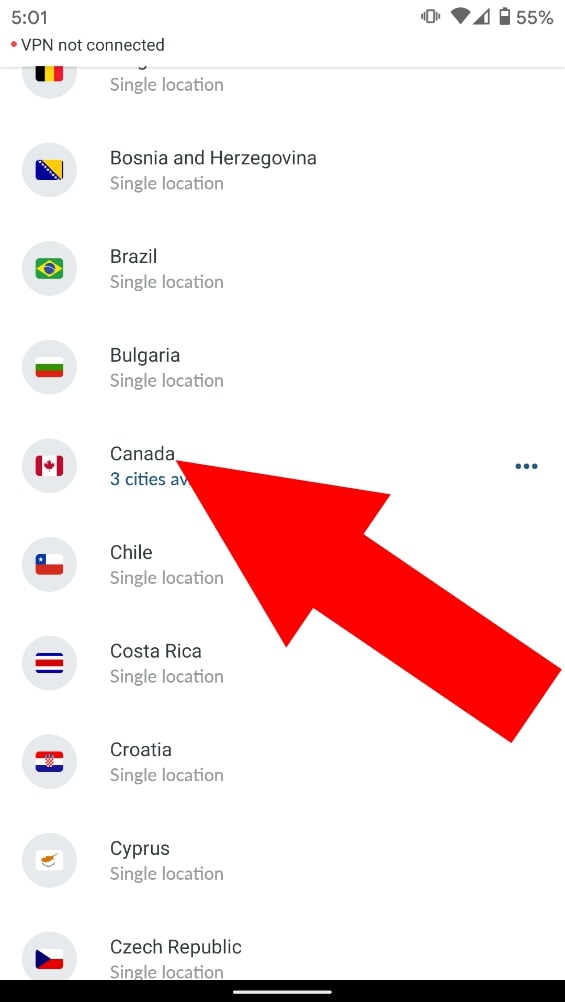
You’ll then be connected to the country you selected and you can start streaming Netflix or doing whatever you wanted to do. While you’re connected, you will see the NordVPN notification in your notification shade just like if you used “Quick Connect”.
Tip: If you’re trying to use NordVPN to hide your location from a website but you’ve already visited that website without NordVPN enabled, you may need to either use an incognito window or clear the cache and cookies in Chrome on your phone.
How To Disconnect Nord VPN
When you want to turn the VPN off, you can either tap disconnect in the notification as I explained above, or you can go into the app and turn it off by taping “Disconnect”.
NordVPN App Settings
Once you’ve got NordVPN installed and you know how to use it, you might want to tweak some of the settings in the app. To do this, open the app and tap on the cog icon in the top left-hand corner.

The first thing you will see in settings is just some information about your account, it’s useful if you want to check how long before your subscription expires. Or if you want to log out of the app, you can do so by tapping the three dots next to your email address and then tapping logout. But other than that, there’s nothing you really need to do with the “My Subscription” section.
The first real option in the settings allows you to toggle “CyberSec” on and off. If you turn it on, it will boost security and help to protect you from viruses, phishing attempts, and other cyber threats. But if you have it turned on, you might run into issues with a certain service you use. But I would recommend turning it on, as you can easily just come back here and turn it off if you run into any issues.
The next option is called “Allow local network discovery” when enabled, it will allow you to access other devices that are on your local wifi network. If you’re at your home or office, I would recommend turning this on as it will allow you to use things like wireless printers or Chromecasts that you might have around your home while still being safely connected to the VPN.
But if you are using free public wifi somewhere, you might want to turn it off as it can be a security threat if you’re connected to an untrusted network.
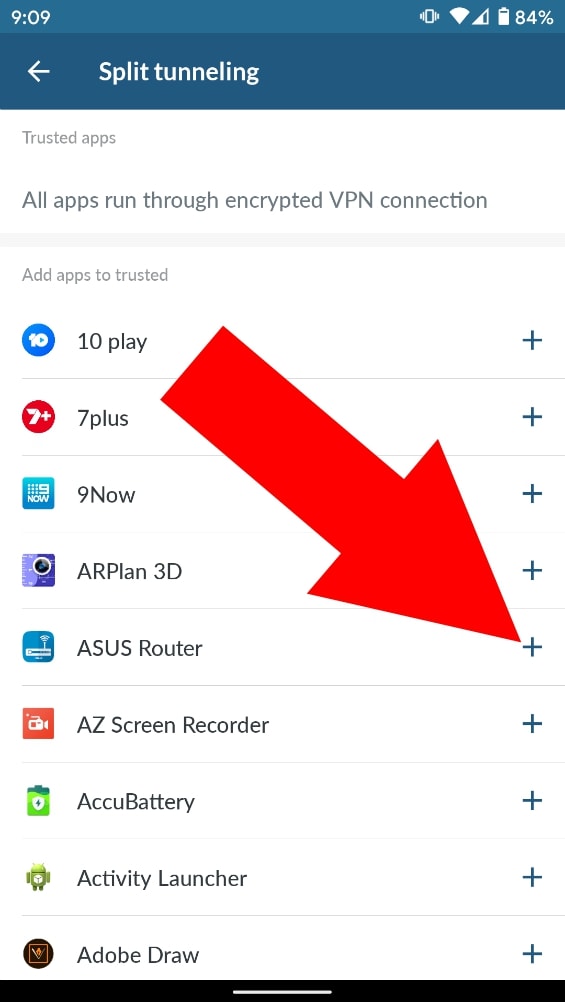
The next option is called “Split tunneling”. If you have a specific app that you don’t want using the VPN, you can allow that app to access the internet without the VPN even when the VPN’s turned on. To do this, tap on the “Split tunneling” option in settings and just tap on the plus sign next to any app you want to exclude from the VPN.
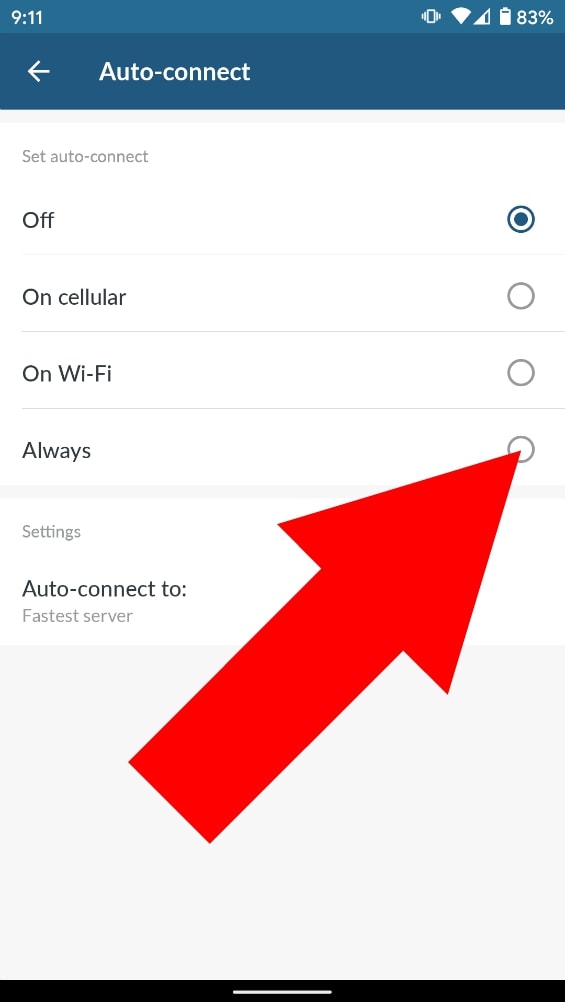
The next option is called “Auto-connect”, if you want your phone to automatically connect to the VPN, you’ll want to enable this. To do this, tap on “Auto-connect” in the settings menu, and you’ll then be able to choose between “Off”, “On cellular”, “On wifi”, or “Always”.
If you choose “Off”, it will only connect when you open the app and manually connect it. If you choose “On cellular”, it will automatically connect whenever your phone is using a cellular connection, and then disconnect whenever you connect to Wifi.
If you choose “On-Wi-Fi”, it will automatically connect whenever your phone is connected to Wifi, and then disconnect whenever you’re not connected to wifi. And if you choose “Always”, your phone will always be connected to the VPN no matter what.
The next option is “VPN protocol”, if you are very familiar with VPNs, you might have a specific reason you want to change this. But unless you know what you’re doing, I’d recommend just leaving it set to “Use recommended”.
The next option is “Custom DNS”, if you’re a bit more advanced, and want to use a custom DNS server, this is where you can do it. But if not, just leave this as default.
The next option is called “Kill Switch”. Essentially what this does is if for any reason the VPN stops, the app will prevent your phone from using any internet until the VPN is enabled again. I probably wouldn’t recommend enabling this as it’s a bit difficult to set up and can lead to some issues.
The next option is called “Tapjacking protection”. If you enable this, and a malicious app tries to trick you into taping something you don’t want to tap, NordVPN alert you. I’d recommend enabling this as there’s really no harm in doing so and it could end up saving you from something terrible happening.
So there you have it, if you’ve read this article the whole way through. You now know how to install NordVPN on your phone, how to connect to a VPN server in any country you want, and you now know about all the different settings found in the NordVPN Android app.