How To Add NordVPN To Chrome
NordVPN is a wonderful VPN service that I’ve written about many times here on Hi-Tech Weirdo. I’ve even done a speed test where I did multiple speed tests at different times of the day to find out how fast NordVPN is.
But today, I’m going to show you how to install the NordVPN Chrome extension in Google Chrome. And I don’t mean installing NordVPN on Chrome OS (I show you how to do that here). I mean installing the NordVPN Chrome extension in the Chrome web browser on any computer.
Why Install The NordVPN Chrome Extension?
Table of Contents
At this point, you may be wondering, why would I install the NordVPN Chrome extension in Google Chrome when there is already a NordVPN app available for every operating system that has more features? And that is a good question.
For one, the Chrome extension is lighter weight which is a nice bonus if you have a less powerful computer, and it is very slightly easier to install the Chrome extension which is kind of nice. But the real reason you might want to use the Chrome extension instead of the dedicated app is that the Chrome extension will only affect your internet usage within Google Chrome.
So if you turn on the VPN using the Chrome extension, any website you visit or file you upload or download within Google Chrome will go through the VPN, but any internet usage outside of Google Chrome (eg: a different web browser, an email app, etc) will just go through your normal internet connection with no VPN.
This can be a downside at times, but depending on your use case, this could be super useful! But I’m not going to get into all the possible uses here, because if this would be useful to you, you probably already know what you’re going to do with it.
If you want all of your internet usage to go through NordVPN, you’ll just want to install the proper app instead. You can see how to do that here on Windows, here on Chrome OS, and here on Mac OS. But if you do want to install the Chrome extension, here’s how it’s done.
How To Install The NordVPN Chrome Extension
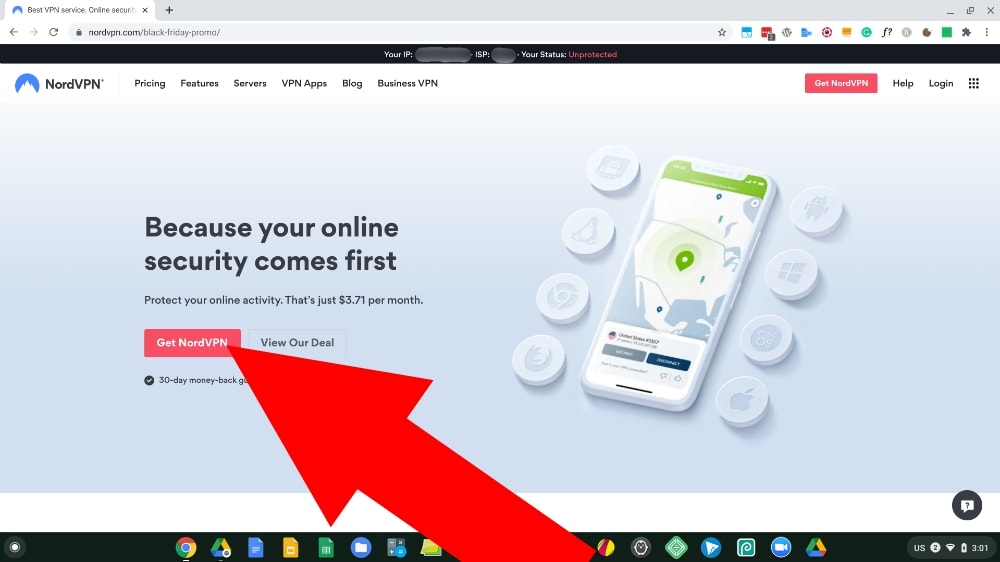
Before we can get into installing the NordVPN Chrome extension, you’ll first need to sign up to NordVPN if you haven’t already. If you already have an account, you can just skip this step, but if you don’t, you’ll need to go to the NordVPN website, click “Get NordVPN” and follow the prompts to finish creating your account.
Click here to read the results of my extensive tests of NordVPN and find out just how fast it is!
Once you’ve created your account (and saved your password), you’ll be ready to begin installing it.
To install the NordVPN Chrome extension in Google Chrome, all you’ll need to do is click here to view the extension in the Chrome Web Store and click the “Add to Chrome” button.
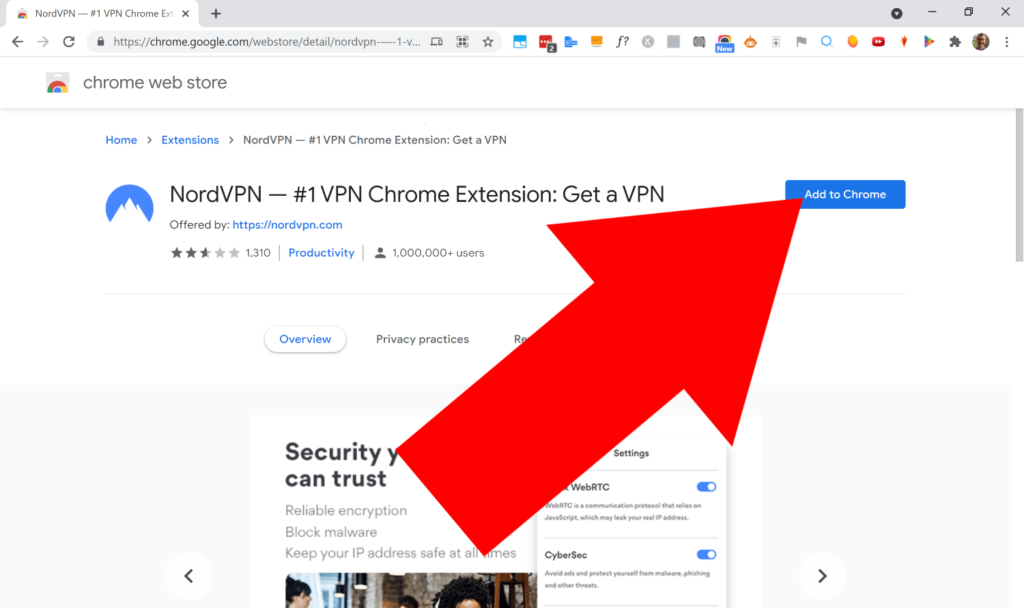
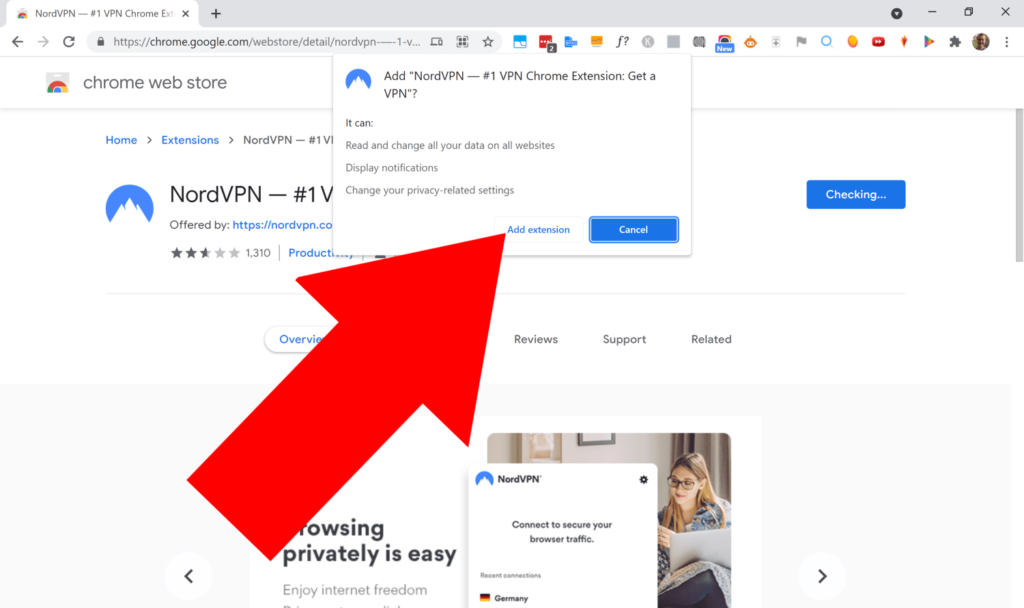
And then, a popup will appear asking you if you’re sure you want to install NordVPN, and you’ll need to click “Add extension” to proceed.
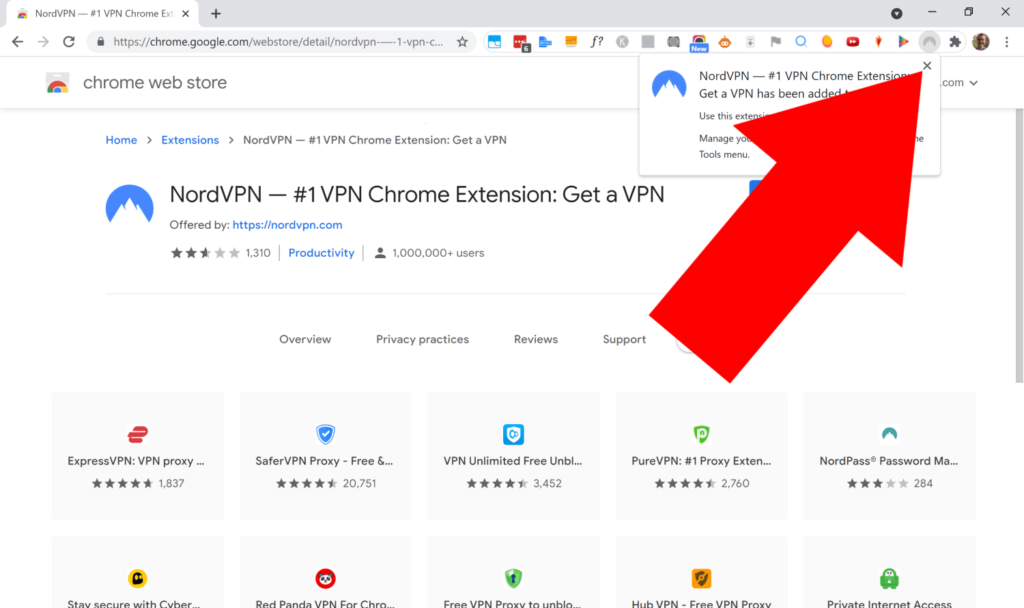
Now, after a few seconds, the extension will be installed, and you’ll see a popup message telling you that it’s been installed. You can just click the cross in the top right hand corner to close this popup.
Now, the NordVPN extension will be installed, and all you’ll need to do is sign in to it with your NordVPN account and you’ll be ready to go!
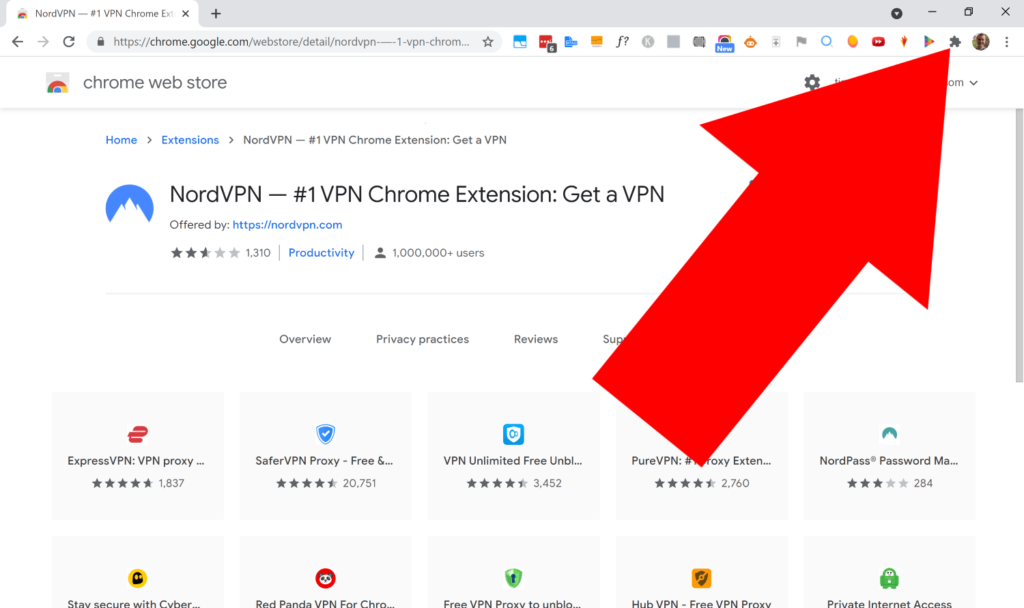
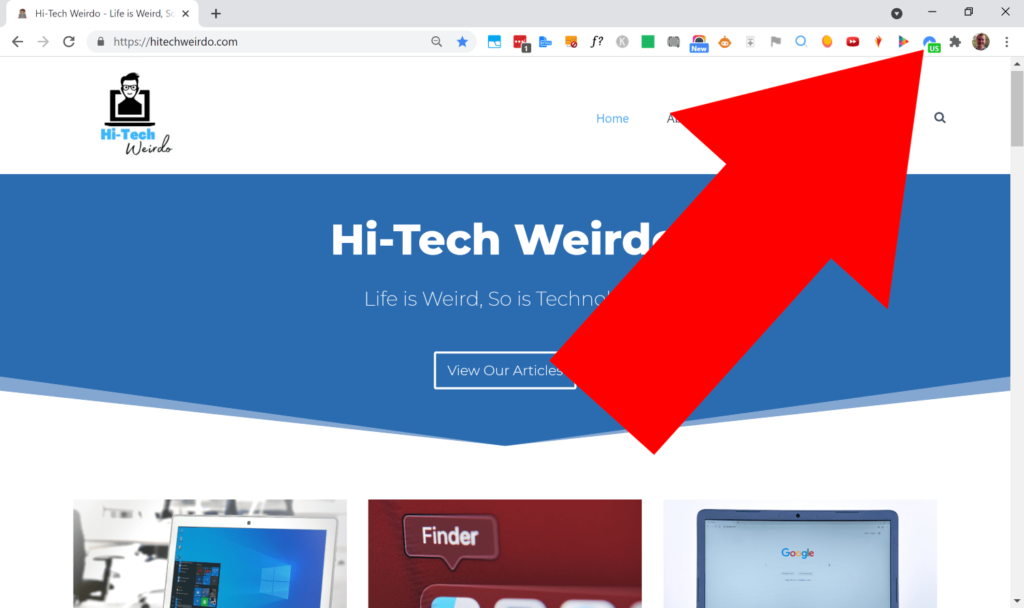
To do that, you’ll first need to click on the puzzle pice icon in the top right hand corner…
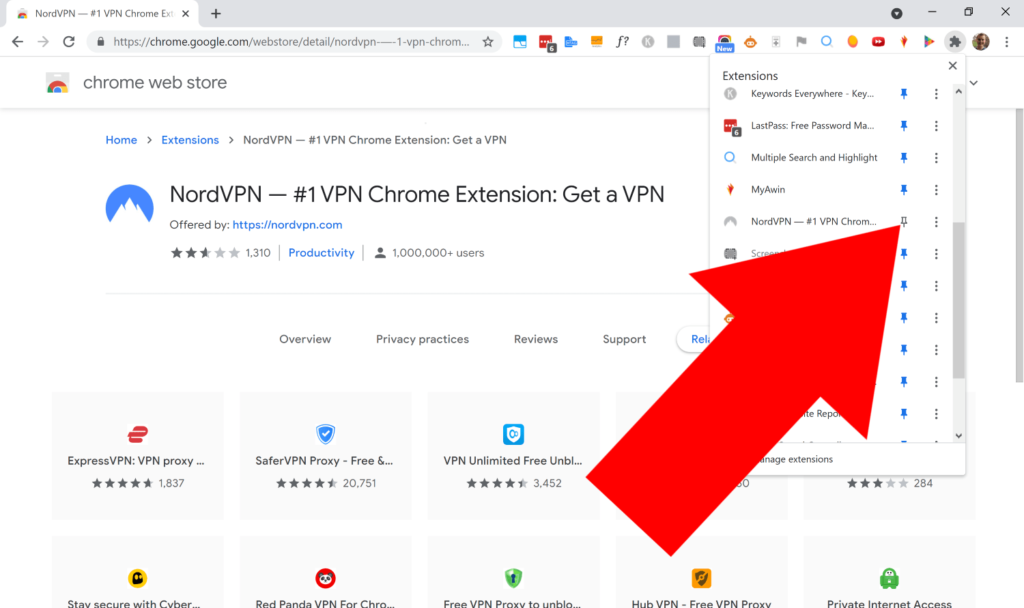
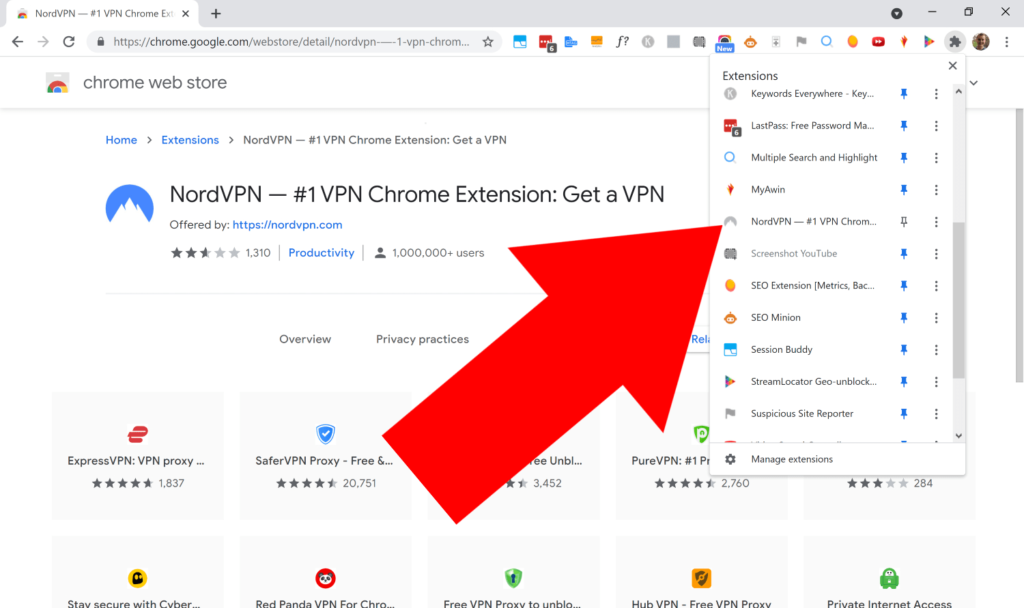
And then, a list of all your Chrome extensions will appear, and in that list, you’ll need to find the “NordVPN” extension that you just installed.
Once you’ve found it, if you want the extension to stay permanently in the bar at the top of the screen so that you can access it more easily, you’ll just need to click the pin icon next to it.
But then, regardless of weather or not you pinned it, you’ll just need to click on the extension to open it up and begin signing in.
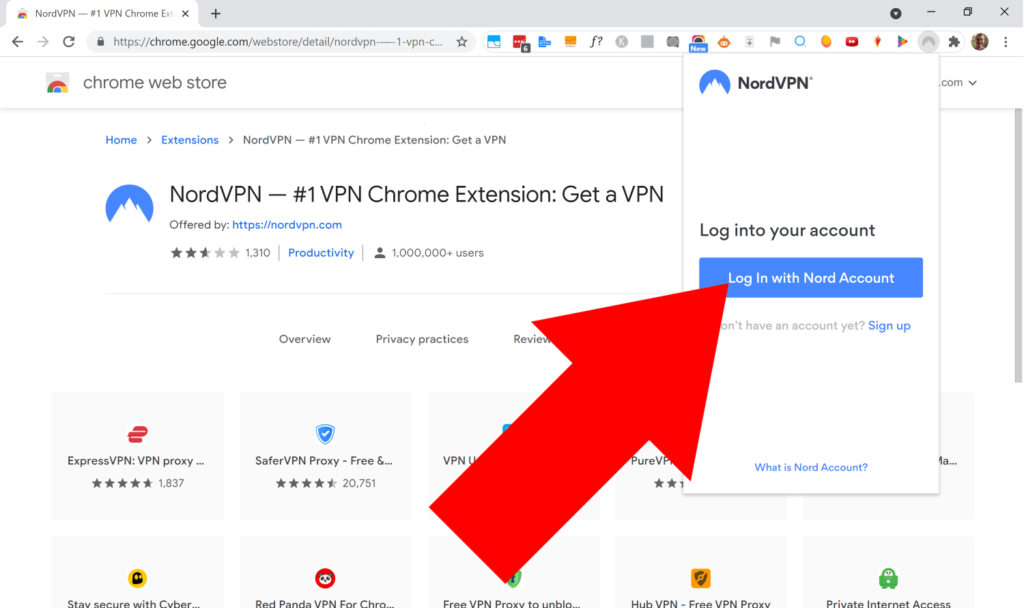
Now, a box will appear in the top right hand corner of the screen, and in that box, you’ll need to click the “Log In with Nord Account” button to log into it.
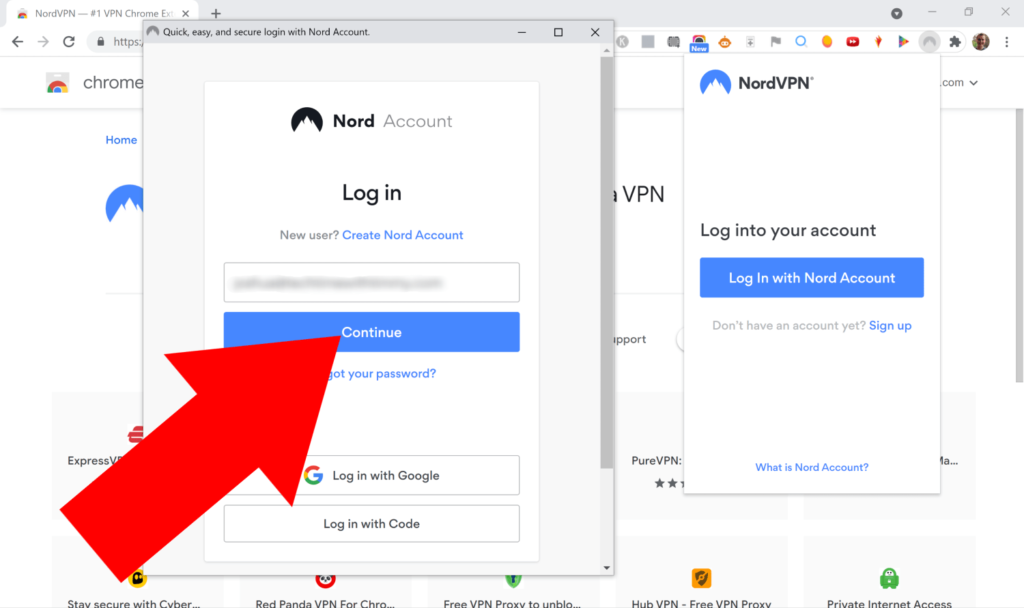
Now, a popup window will appear where you’ll need to enter the username or email address for the Nord account you would have created when you first signed up. And then, click “Continue”.
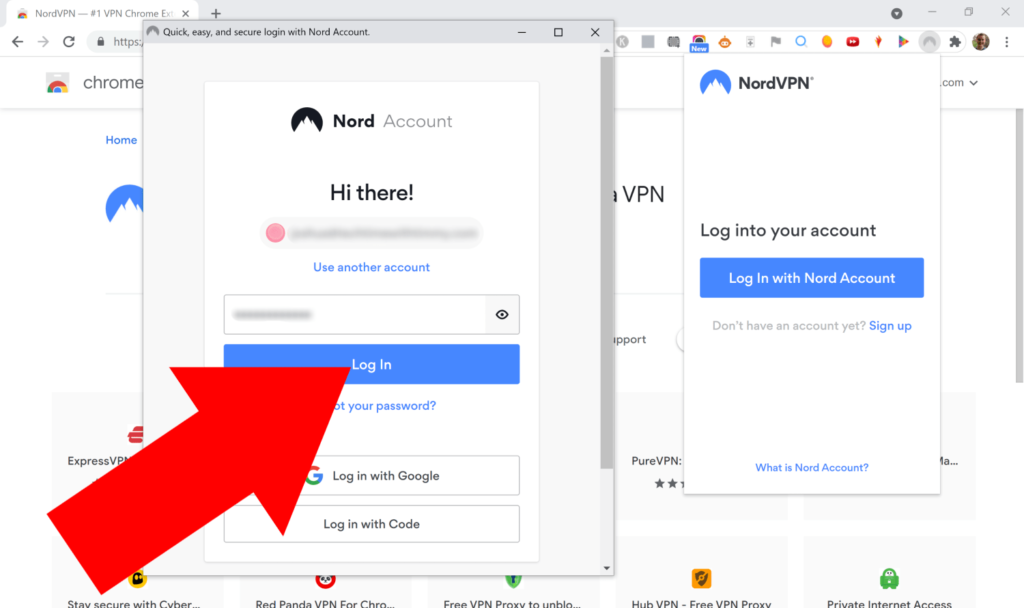
And now, on the next page, you’ll need to enter your Nord password and click “Log In”.
Now, in the popup window, you’ll see a message saying “You’ve logged in successfully, you can now close this window”, and that means you can click the cross to close the window.
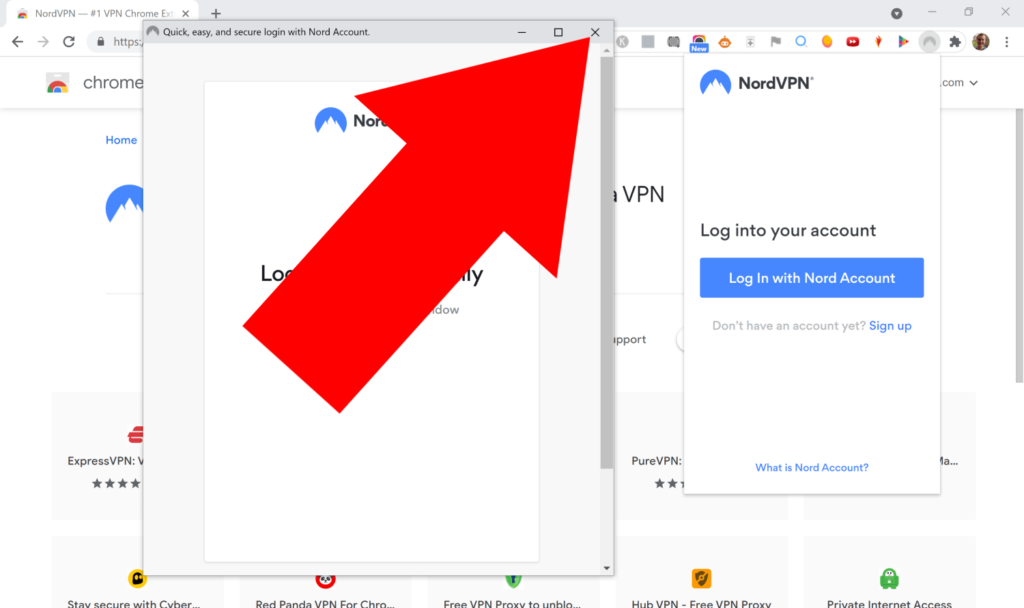
Pretty much instantly after you close that window, the NordVPN extension will be ready for you to start using it!
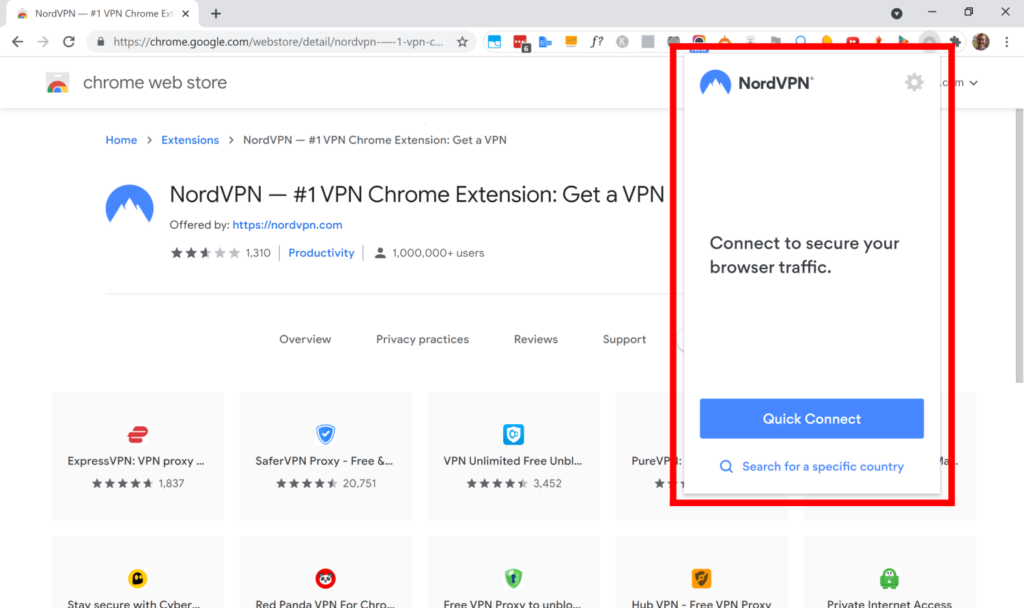
How To Connect To NordVPN With The Chrome Extension
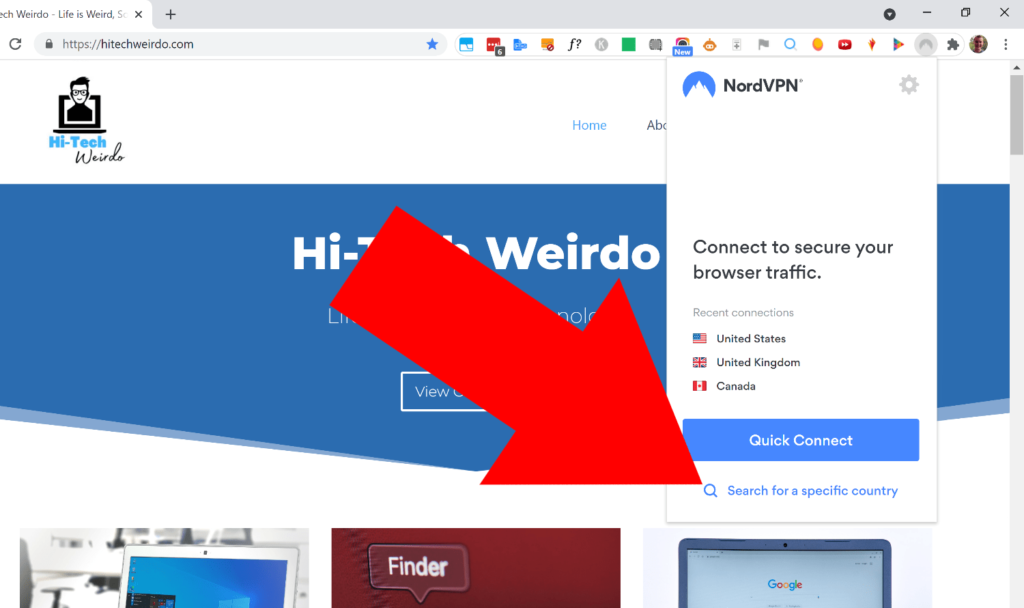
So now, if you want to connect to the best available VPN server, all you’ll have to do is click “Quick Connect”…
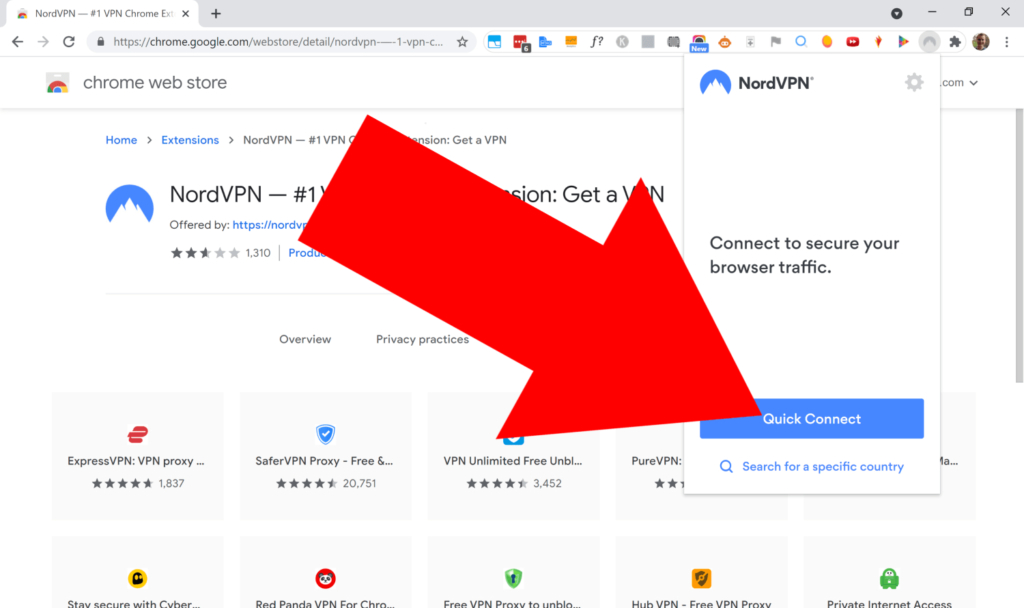
And it will connect!
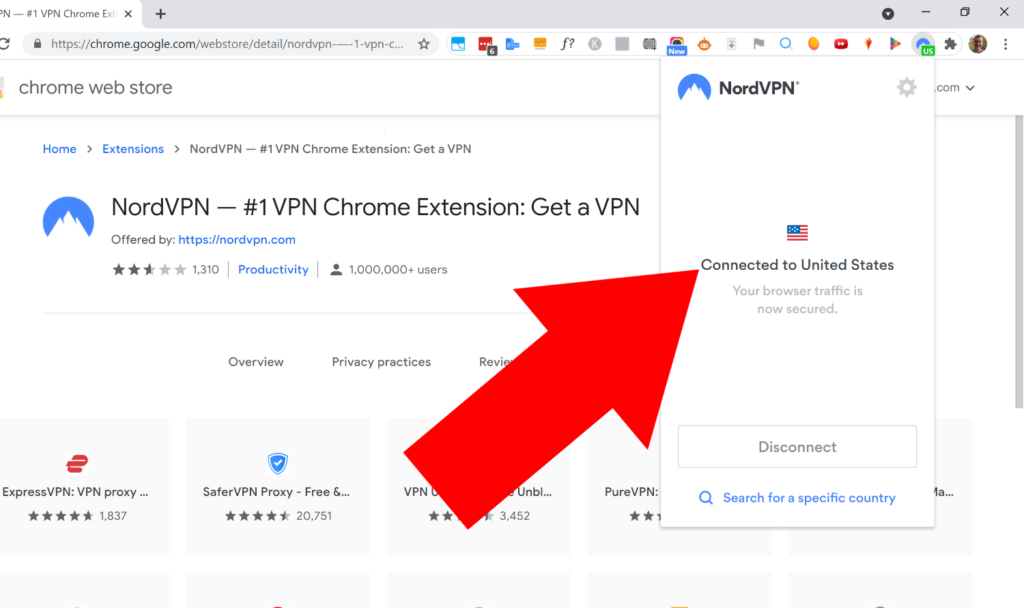
Now, you can do whatever you want inside Google Chrome, and know that anything you do in there will go through the VPN, while any other app you use on your computer will not go through the VPN.
And if you chose to pin the app to the top bar of Google Chrome, while you’re browsing the web, you will always know the VPN is enabled because the NordVPN logo will be lit up in blue, and there will be a green badge showing what country you’re connected to.
How To Disconnect The VPN
When you’re done, if you want to disconnect the VPN connection, all you’ll need to do is click on the extension to open it up, and then click the “Disconnect” button.
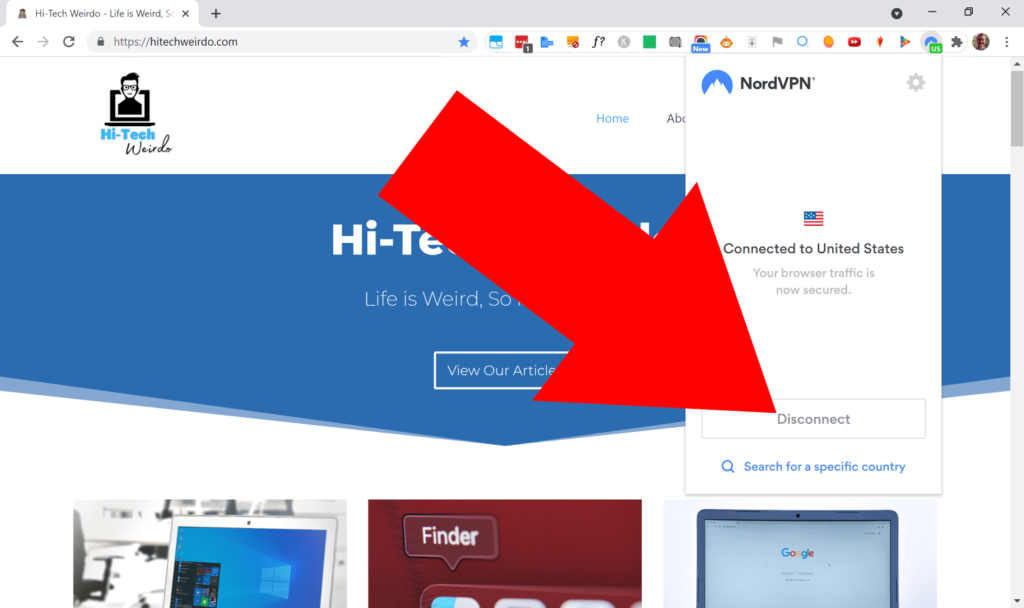
And then, the VPN will be disconnected!
How To Connect To A Specific Country
If you want to use the Chrome extension to connect to a server in a specific country to perhaps watch international Netflix or view any website that is only available in a different country…
All you need to do is click on the extension to open it, and then, below the “Quick Connect” button, click “Search for a specific country”.
Now, you’ll see a list of every country that NordVPN currently has a server in.
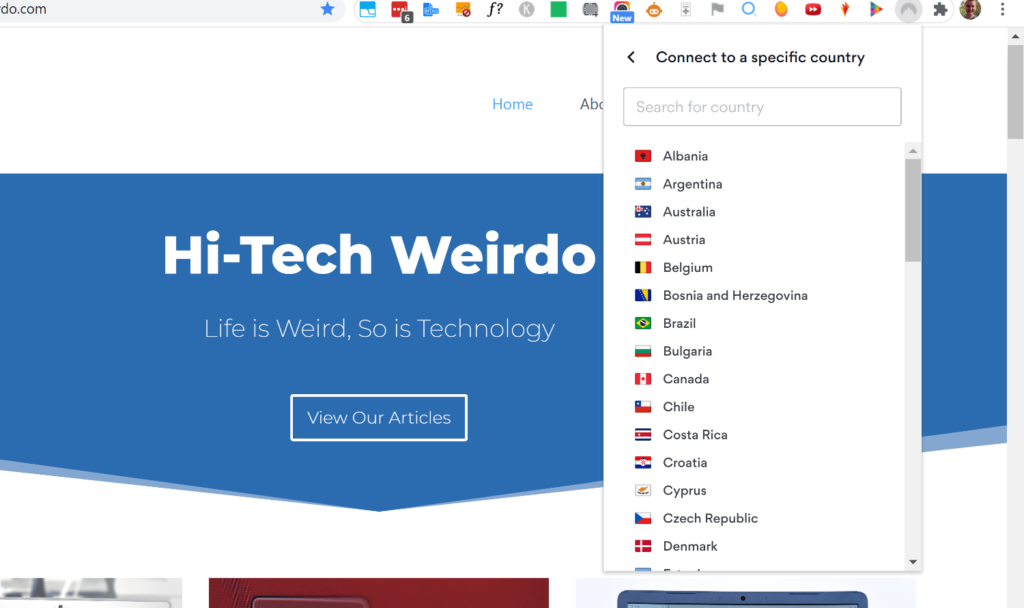
You can scroll through this list until you find the one you want to connect to, but the list is fairly long so it’s really a lot quicker and easier to just type the first few letters of the country into the search box at the top…
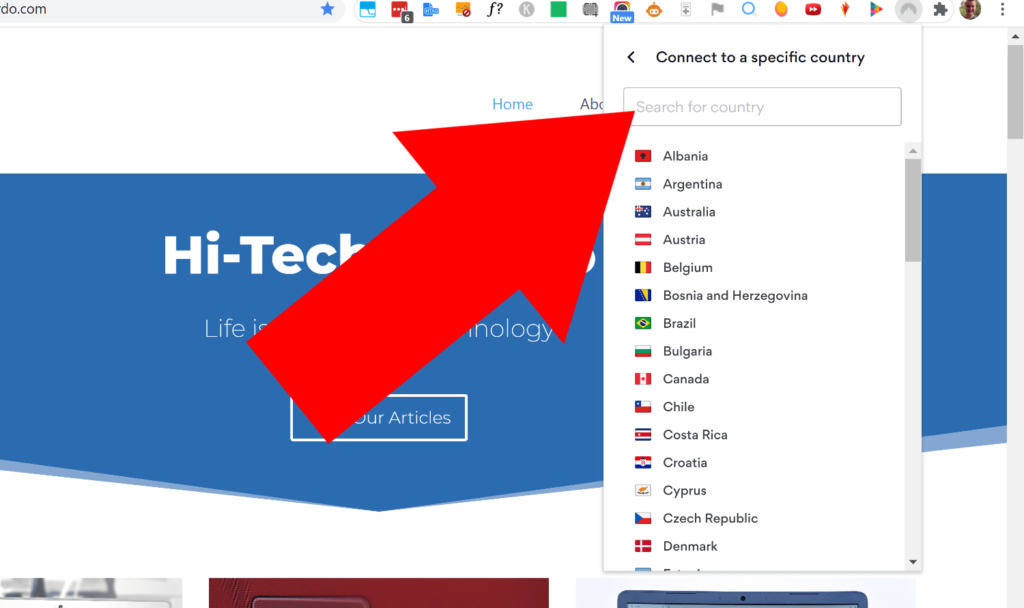
And then, the country you want to connect to will be the only one in the list, and you can just click on it to connect to it.
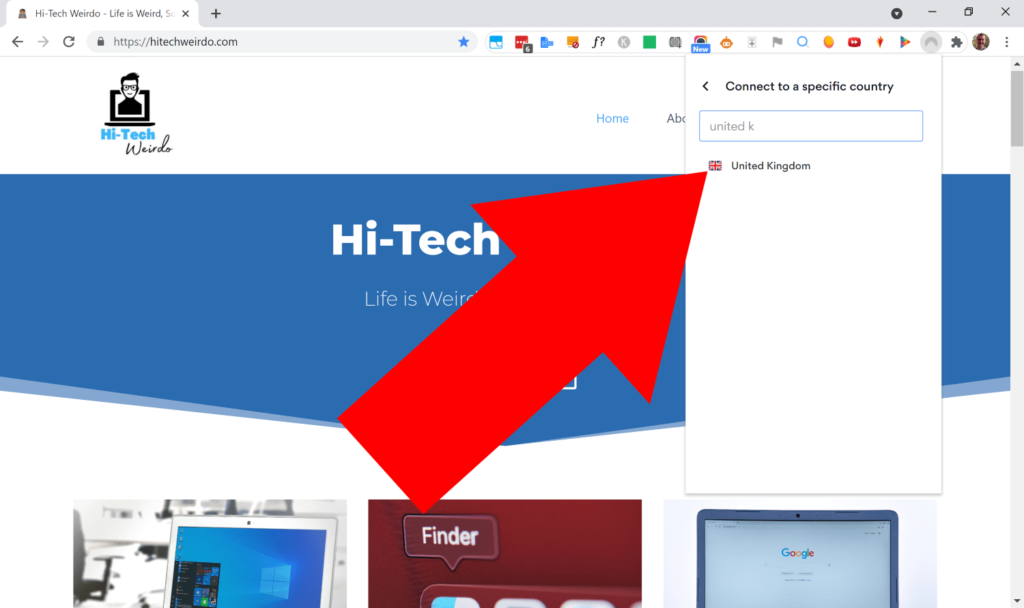
And now you’ll be connected!
Tip: If you’re using NordVPN to try and hide your location from a specific website, but you’ve already visited that website without NordVPN being enabled, you might need to either use an incognito window or clear your cache and cookies.
And that’s all there is to it! Now you can use NordVPN in Google Chrome without having to install the proper app, and without all the other apps on your computer having to use the VPN!

