How To Test If An Email Address Is Valid – A Mailcheck.co Review
If you have a mailing list full of email addresses that you send emails to, it’s important to verify whether or not each email address is actually valid.
If you run your email campaign with a whole lot of fake or expired email addresses on your list, you will not only be wasting your email sending limit by sending emails that will never be received.
But if you send too many emails that end up bouncing, you could get blacklisted by certain mail servers and your email sending service might even suspend your account.
So in this article, I’m going to be taking a look at mailcheck.co. It’s an awesome tool that allows you to very easily verify all the email addresses on your list to make sure they’re all legitimate.
It allows you to check 100 emails a month for free which is great for testing. But for real-world use, you’ll probably need to check more addresses than that which means you’ll need a paid plan starting at $10 USD a month. But it’s definitely worth it for anyone who has an email list.
And better yet, if you sign up using my link, you will get $5 off your first payment.
How To Signup For Mailcheck
Table of Contents
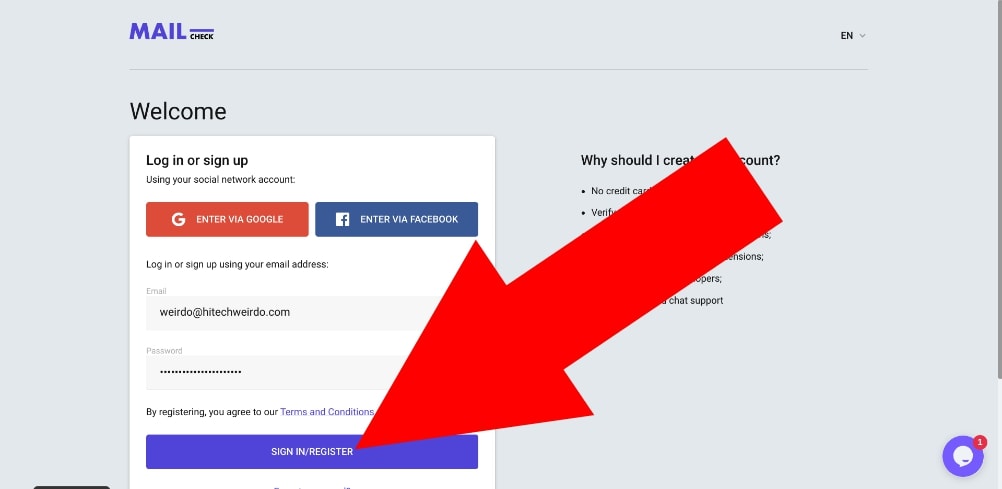
In order to use Mailcheck, you’ll obviously need to sign up and create an account. To do this, head on over to their signup page, enter your email address, enter the password you want to use with your account, and click “SIGN IN / REGISTER”.
You’ll then be prompted to choose the plan that works best for you (that part is fairly self-explanatory) and enter your payment details to complete the signup process.
Once your account is all set up, you should be looking at a dashboard that looks something like this which means you’re all ready to go.
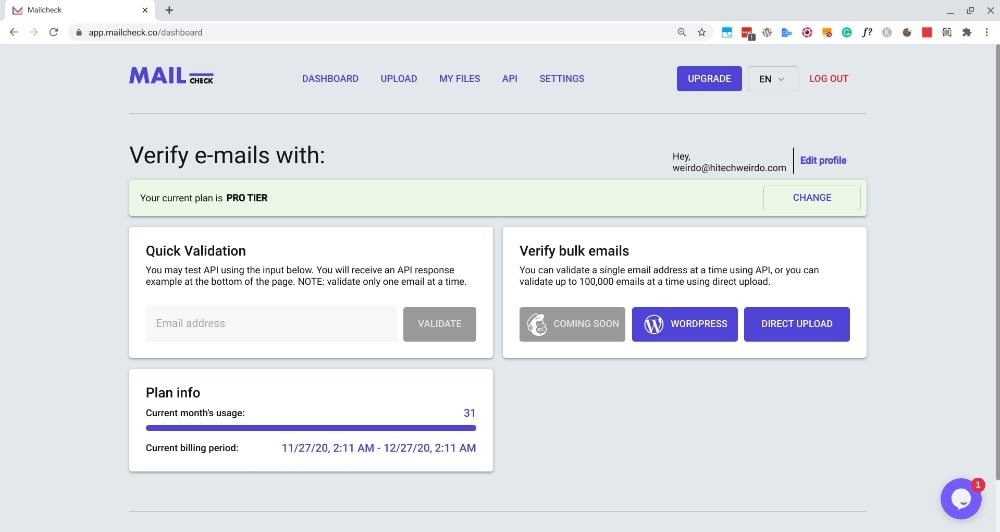
Once you’re in your dashboard, you’ll be able to start checking email addresses. First, I’ll be showing you how to check email addresses one by one, and a little further down the page, I’ll show you how to verify your whole email list at once.
How To Check If A Single Email Address Is Valid
If you just have one specific email address that you want to quickly check, you can just type the email address in the email field under “Quick Validation” on your dashboard and click “Validate” to validate the email address.
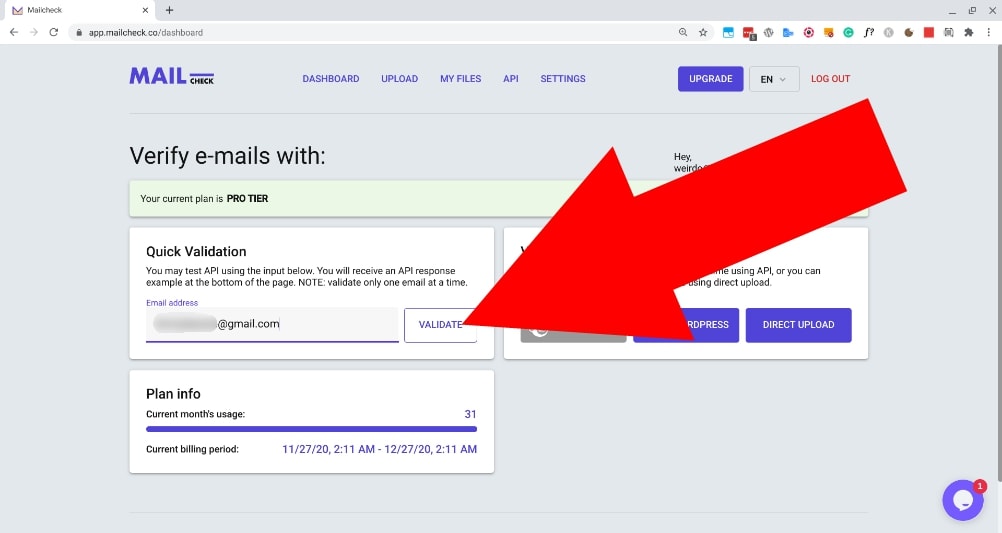
After clicking “Validate”, you’ll then see the validation results appear below.
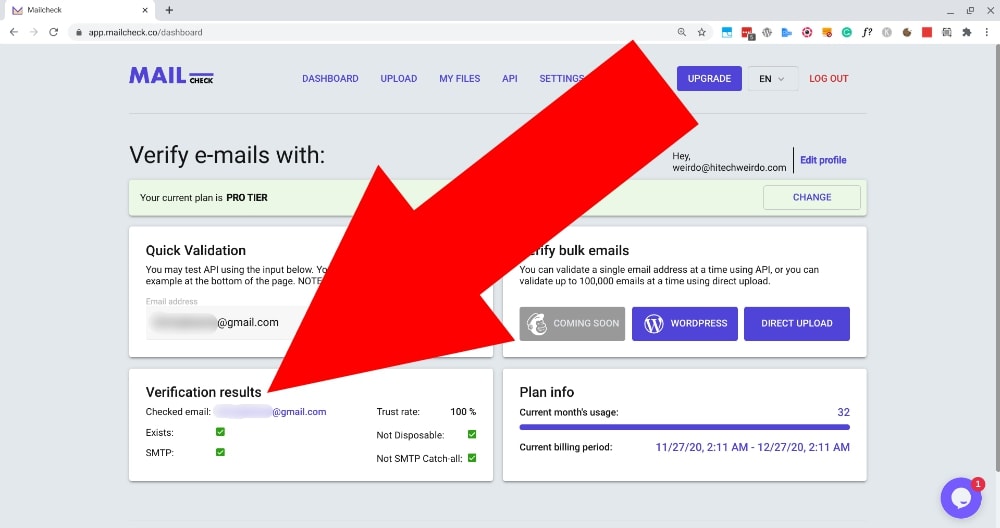
The most important thing you’ll want to look at when you validate an email address is the “Trust rate”. The Trust Rate is Mailcheck’s overall score to determine how likely it is that this is currently a real person’s email address.
As you can see in the image above, the email address I checked has a 100% trust rate which is perfect, and it also has green ticks to show that it has passed the following tests:
- Exists
- SMTP
- Not Disposable
- Not SMTP Catch-all
These four tests are what Mailcheck uses to determine the overall trust rate of the email address.
So that email address is perfect, but if I put in a different email address, you will see the results are quite different.
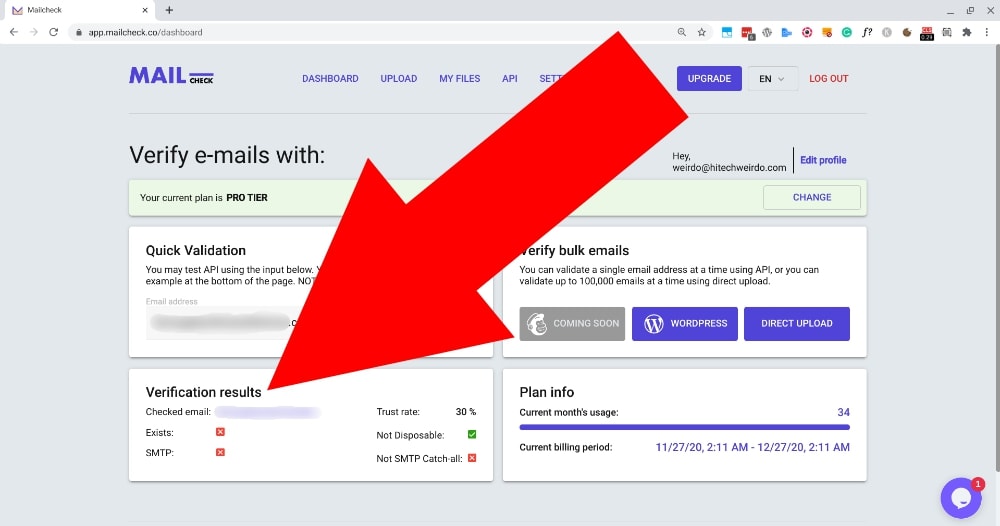
As you can see, the verification results are much worse for this address. It passed the “Not Disposable” test, but it failed the other three giving it an overall trust rate of 30% which is not very good.
So if you have an email address like this on your list, you will probably want to consider removing it.
You don’t need to go removing every email address that gets a trust rate of less than 100%, but if the trust rate is below 50% or 60%, you will probably want to consider removing it.
How To Verify All Email Addresses On Your Mailing List
So whilst the “Quick Validation” feature is handy sometimes, it certainly won’t be practical to validate every single address on your email list that way.
But fortunately, there are a few different ways to very quickly and easily verify every address on your email list (up to 100,000 addresses at a time).
CSV Upload
The most widely accessible method of verifying your entire email list is to upload a CSV. It won’t be quite as automatic as the other two options listed below, but it will work perfectly no matter what email service you are using.
To use this method, you will first obviously need to have a CSV of your email list. Hopefully, you already have one ready to go, but if not, you should be able to login to whatever email sending service you’re using and download a CSV from there.
If you need help with this, just Google something like “how to export email list from insert-service-here“, and there will be plenty of other articles to help you out.
Once you’ve got your CSV of email addresses, log into your Mailcheck dashboard, and click “Direct Upload”.
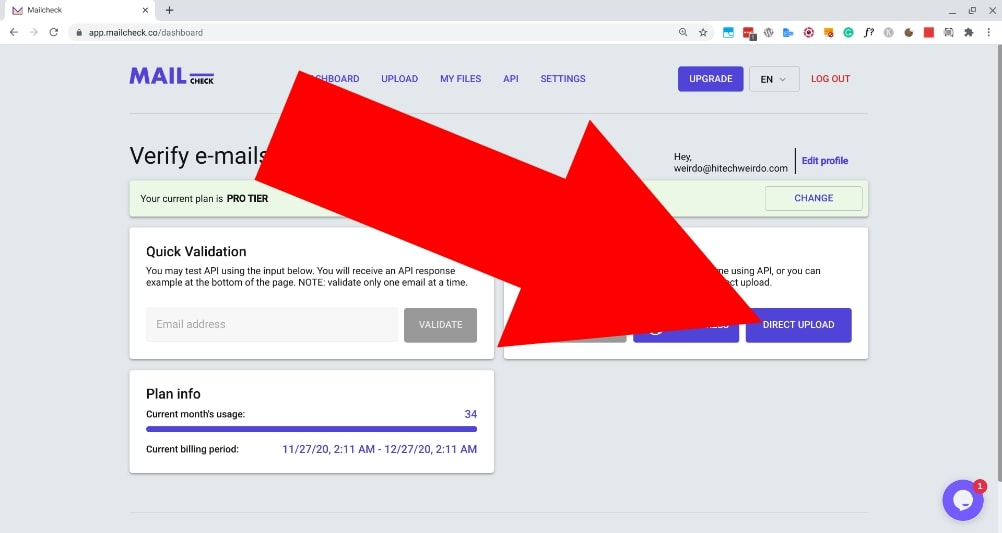
You’ll then need to upload your CSV by either clicking where it says “Upload or drag and drop your file here”, or simply dragging your CSV into the box.
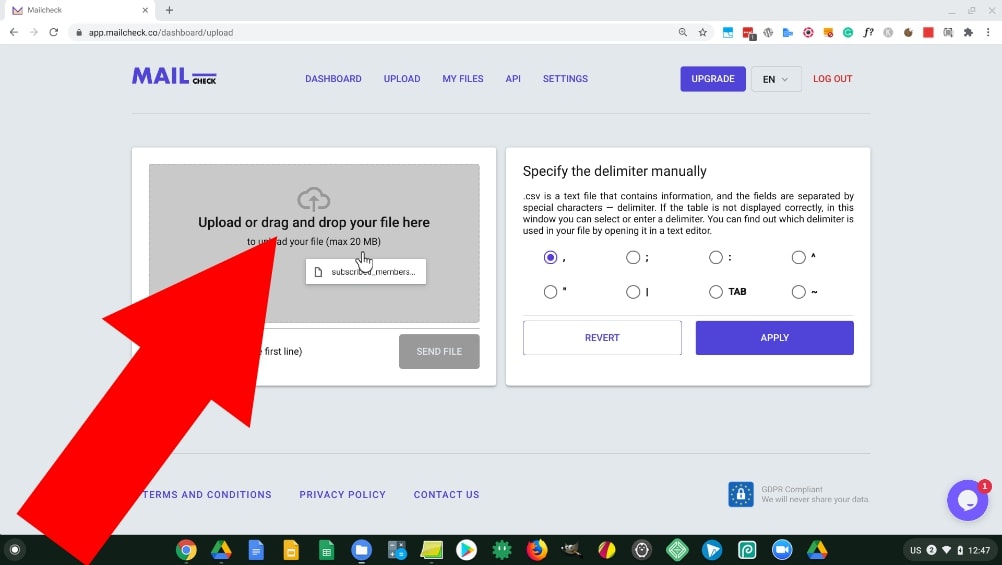
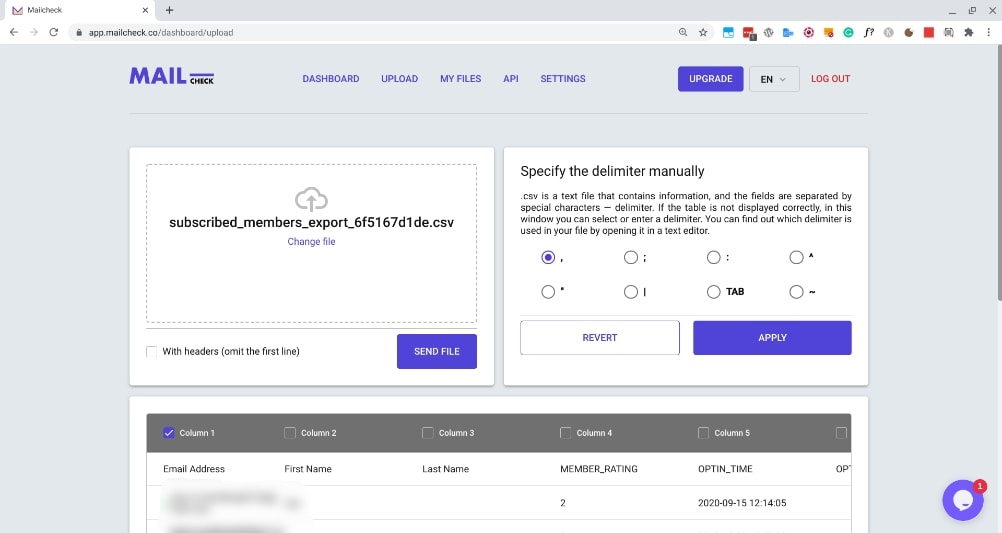
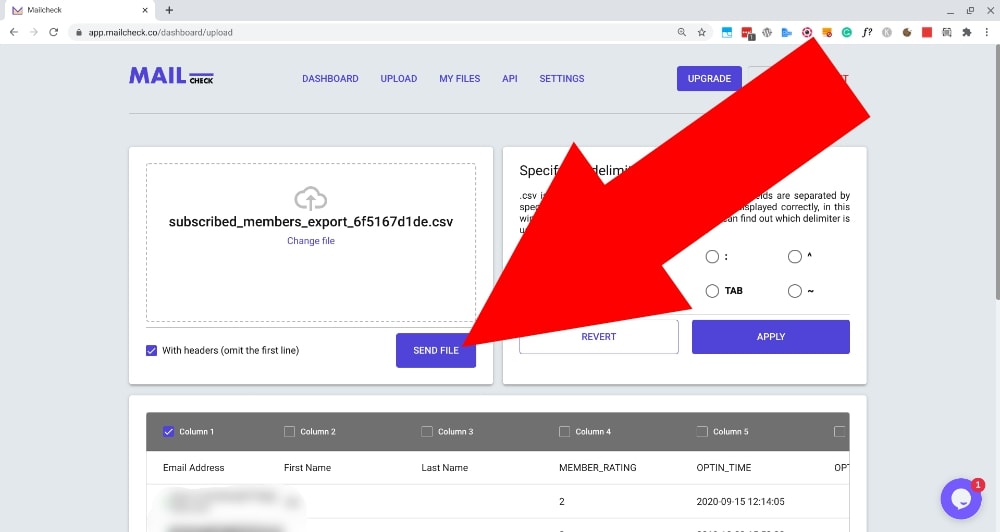
Once your CSV is uploaded, you should see the first few email addresses from your list listed at the bottom of the screen. But before you start the verification process, you’ll probably need to tweak a few settings depending on your file.
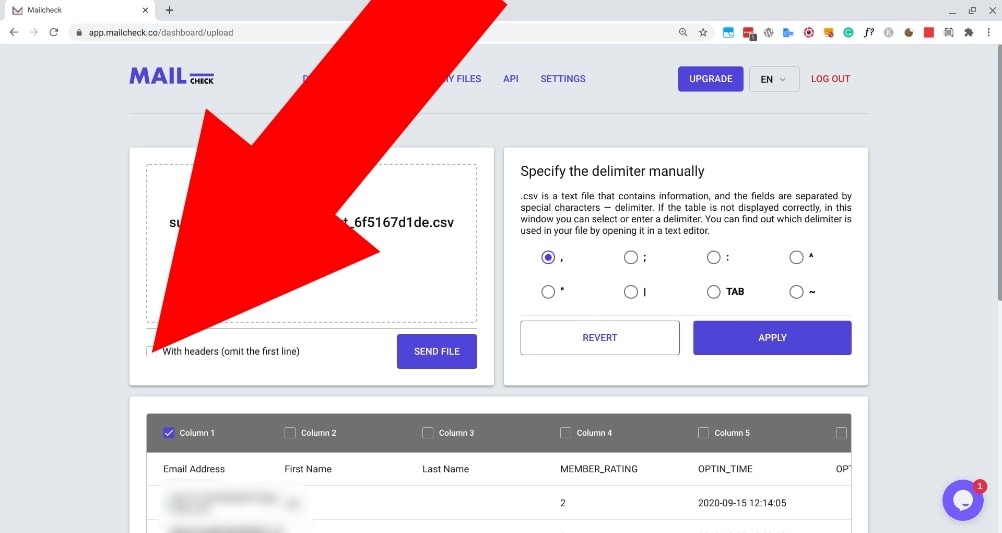
If your CSV file has a header in it that gives a title to every column across the top, you’ll want to check the “With headers” box so that it won’t try to verify anything in the top row.
There is also a chance that you will need to specify the delimiter. The delimiter is the type of separator used in your CSV file.
In most cases, it will be a comma which is the default in Mailcheck so if that’s the case you won’t need to do anything, but if your email addresses are not displaying correctly below, you’ll probably need to specify the delimiter by selecting the different options one by one and clicking “Apply” until the list displays correctly.
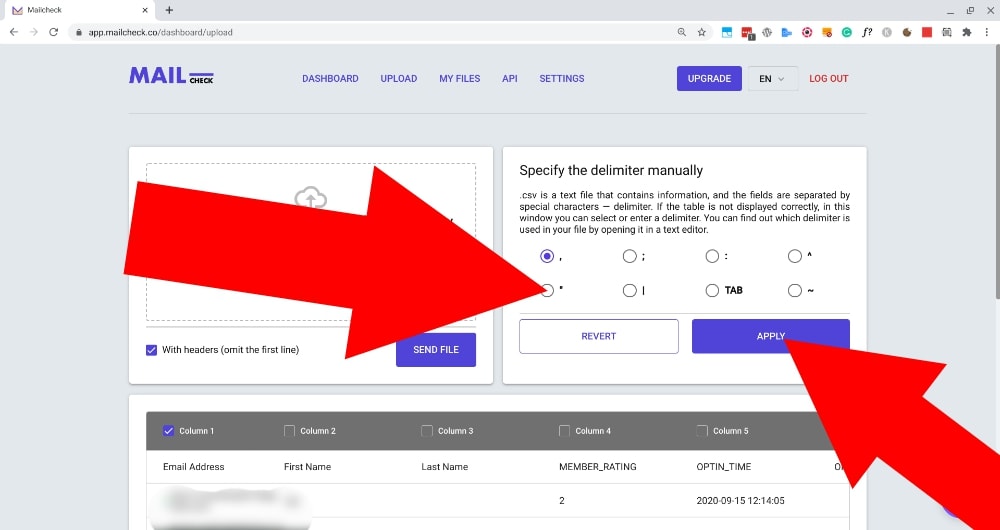
Once you’re finished tweaking the options so it all looks correct, click on the “Send File” button to proceed to the next step.
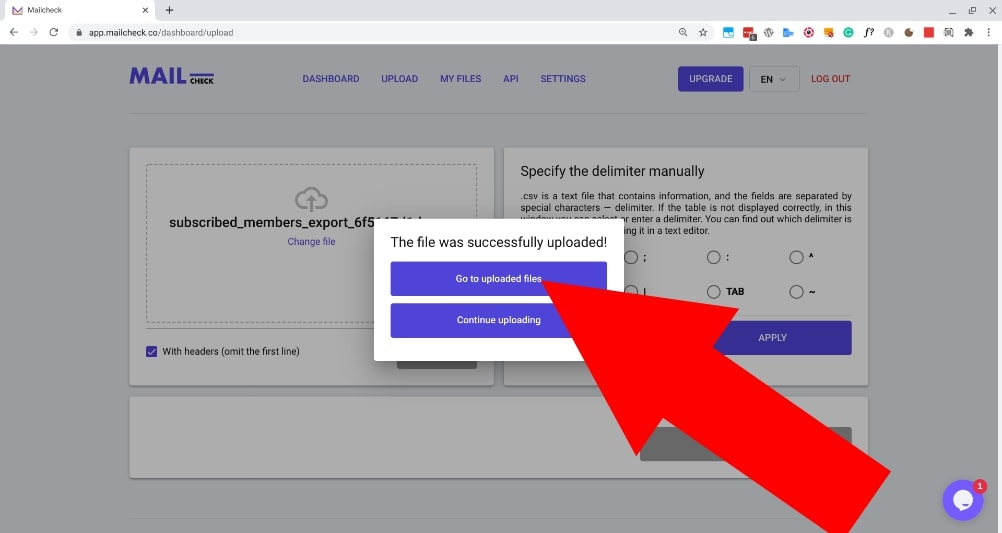
You’ll then see a message letting you know your file was uploaded successfully. If you want to add another CSV before you begin verifying them all, you can click “Continue uploading” and repeat the same process.
But if like me you only want to verify 1 CSV file at the moment, just click “Go to uploaded files”.
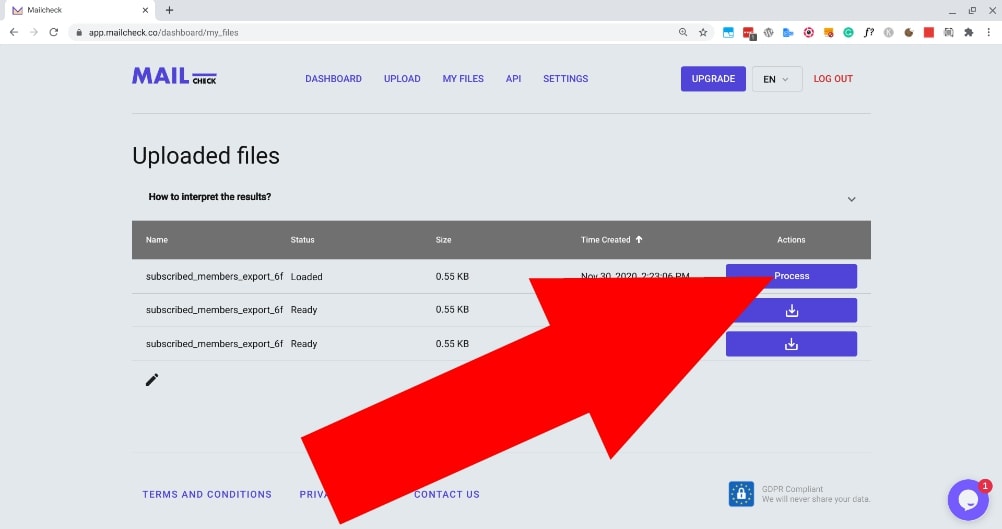
You’ll then see a list of all the CSV files that you have just uploaded, and directly below the newly uploaded ones will be any file that you’ve verified in the past and is ready to be downloaded.
To begin verifying all the email addresses from your newly uploaded CSV file, just click the process button.
You’ll then see a popup letting you know the verification process has started, click “Okay” and wait for it to finish.
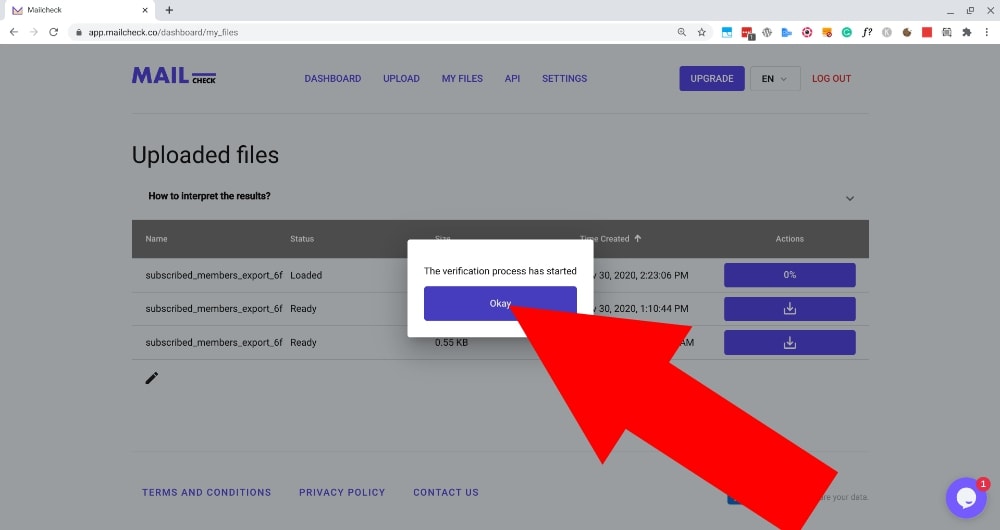
If your list is fairly short, the process should be complete within a few minutes so you can just wait for the button to start showing a download icon. But if your email list is really long, it might take a while so you can just leave and wait to be notified by email when it’s completed.
But regardless of how long it takes to finish, once it’s done, you’ll see a download button next to it, click the download button and the updated CSV file will download to your computer.
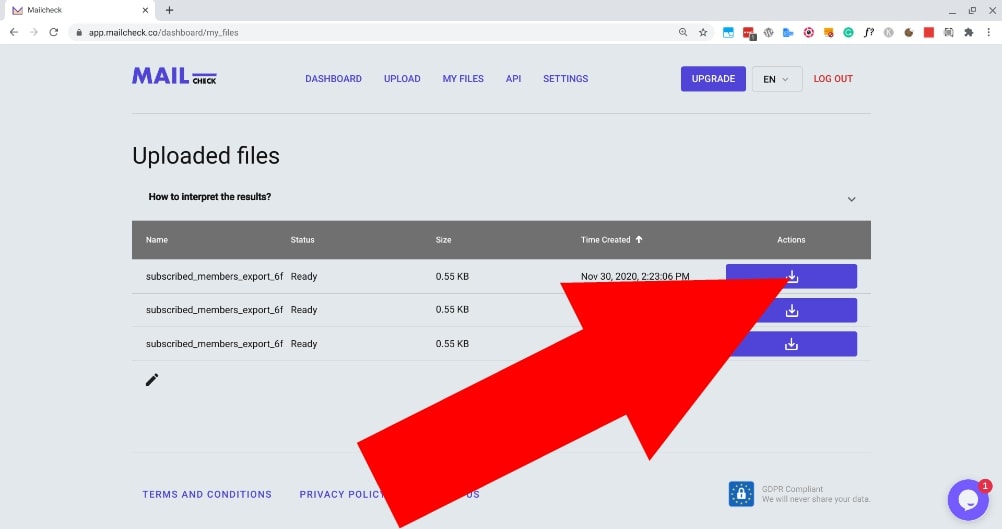
Once the updated CSV is downloaded, you’ll just need to open it up with whatever app you use to work with spreadsheets. (Most people will probably use Excel for this but I prefer Google Sheets.)
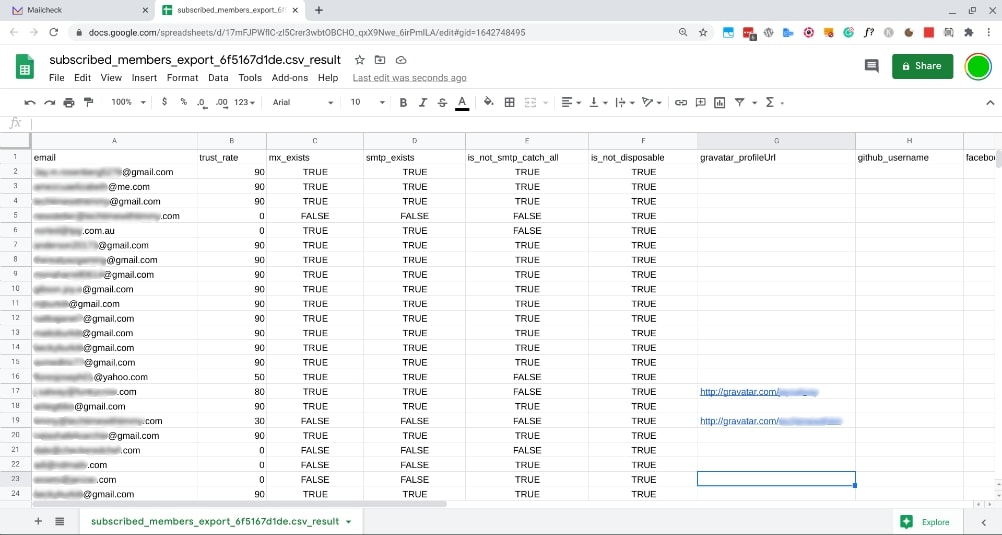
Once you’ve opened your CSV, you’ll see all the email addresses on your list, and next to each of them will be the “Trust rate” followed by whether or not they passed the four tests. (Read more about this above.)
Based on the trust rating, you can then decide which addresses you would like to delete, delete them, save the spreadsheet back into a CSV, and then you’ll have a CSV file of only verified email addresses that you can import back into your email software or do whatever else you would want to do with them.
Mailchimp Intergration
If you use Mailchimp, a much easier way would be to integrate Mailcheck directly with Mailchimp. Unfortunately at the time of writing this article, MailChimp integration is not available just yet so I haven’t been able to test it out.
But some time in the near future, if you use the popular email service MailChimp, you’ll be able to integrate it directly with Mailcheck to very easily verify all your email addresses.
The WordPress Plugin
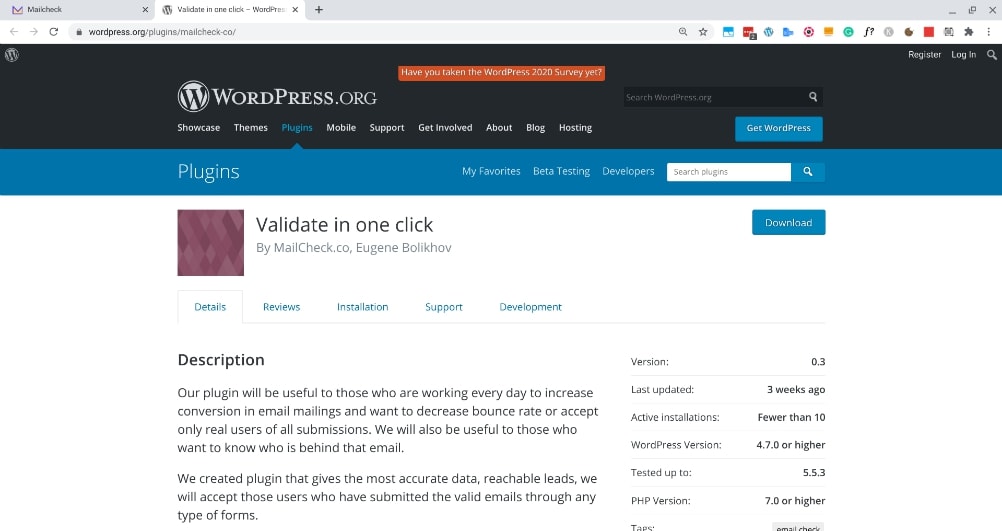
If you use a WordPress based website to capture email addresses, you can actually install the Mailcheck plugin into WordPress and integrate it with:
- WP-forms
- ACF
- Contact Form 7
- Or Woocommerce
To verify people’s email addresses as they’re submitted. The plugin won’t help with your existing email list so you’ll have to use one of the previous two options to take care of that, but once you install this plugin, any new email addresses will be validated for you.
And that’s really all there is to it! If you have a mailing list that possibly has some questionable email addresses on it, I would highly recommend signing up for Mailcheck and verifying your list using any of the methods above.
And if you do decide to sign up, don’t forget to use my link to get $5 off.

