How To Change The Name Of Your Windows 10 Computer
If you want to change the name of your Windows 10 computer, you’re in the right place! Because in this article, that’s exactly what I’m going to show you how to do.
So without any more chit-chat, let’s get straight into the tutorial!
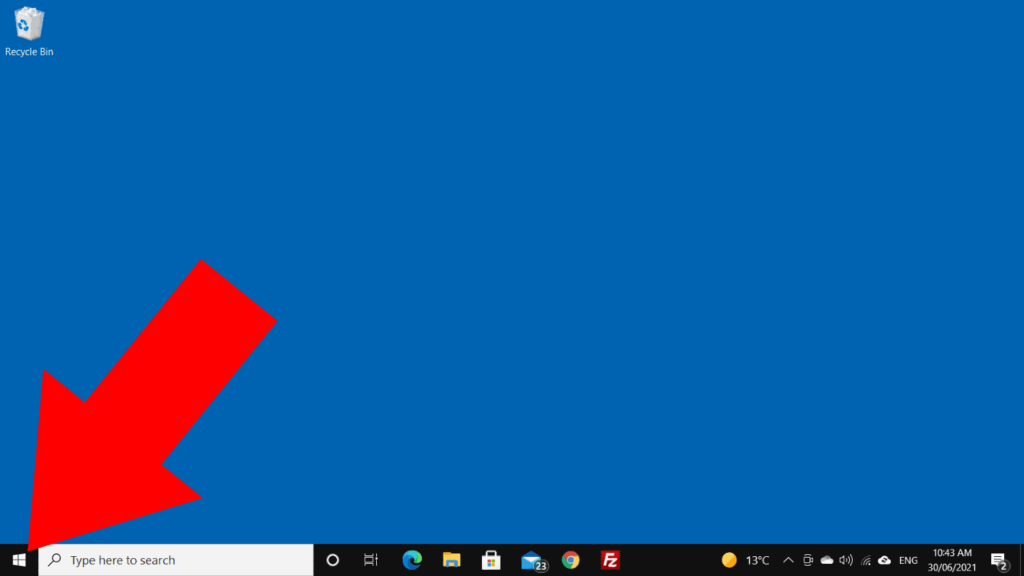
To rename your Windows 10 computer, the first thing you’ll need to do is click on the start button in the bottom left hand corner of the screen to open up the start menu.
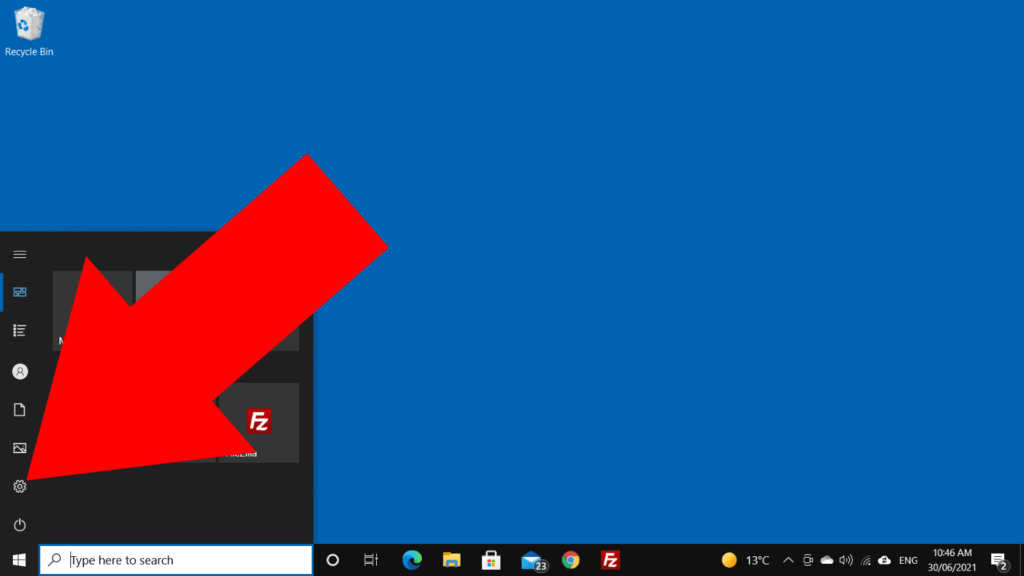
And then, click on the settings icon on the left hand side of the start menu.
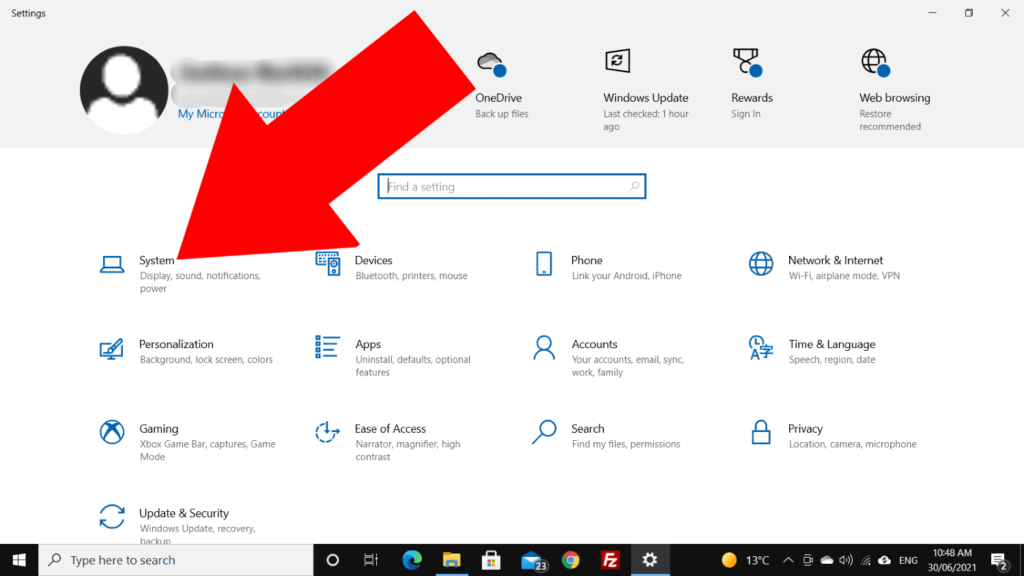
Now, in settings, you’ll need to click on “System”.
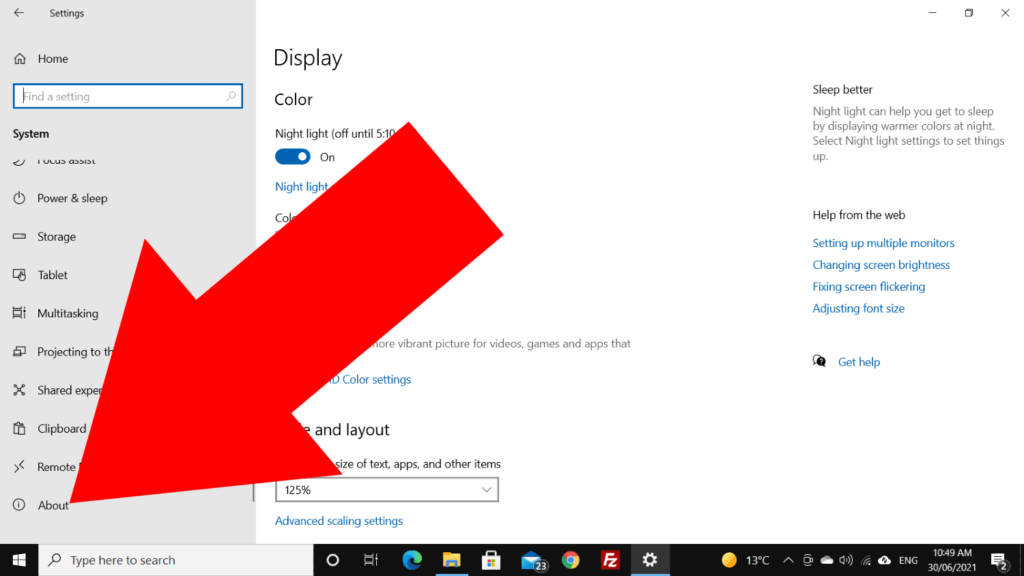
And then, scroll down to the very bottom of the left hand side menu and click on “About”.
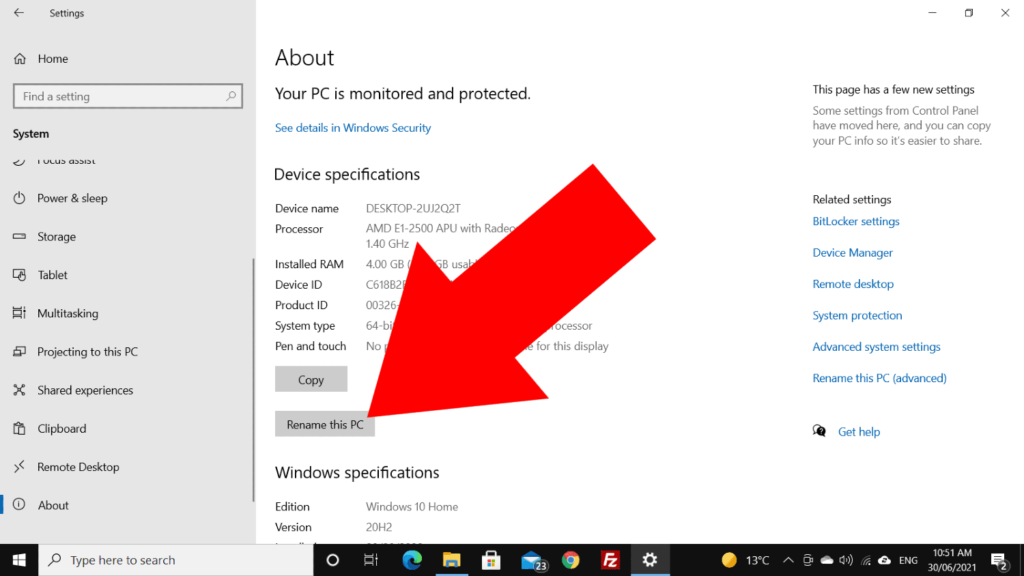
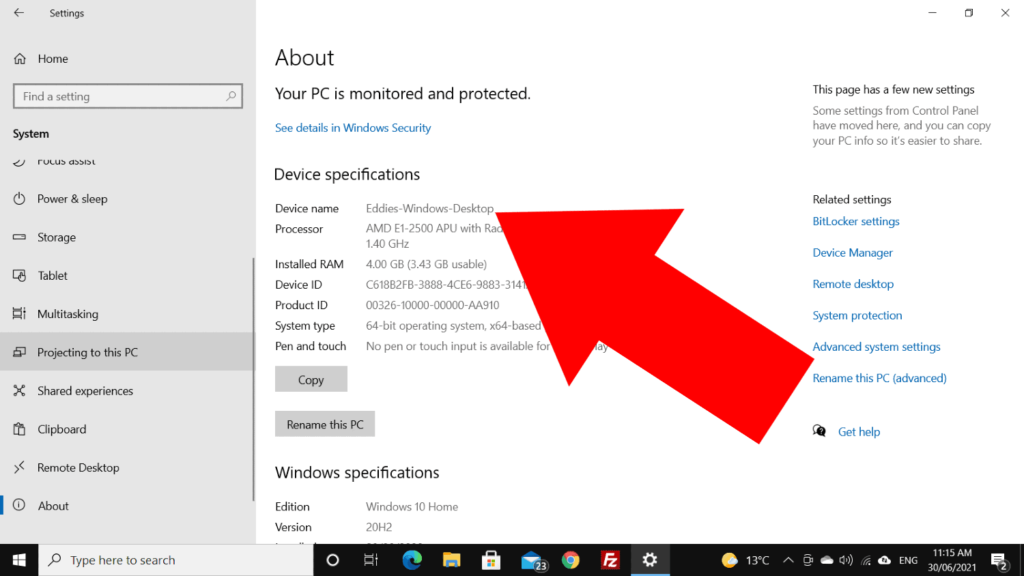
Now, in the about section, you’ll see a whole lot of information about your computer, including the computers current name:
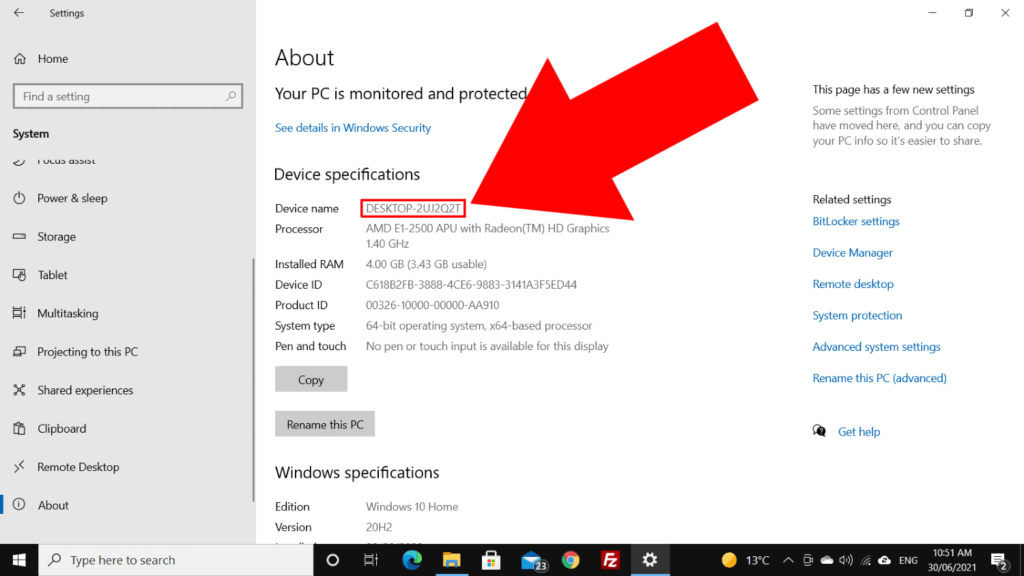
And if you want to change the name of your computer, you’ll need to click “Rename this PC”…
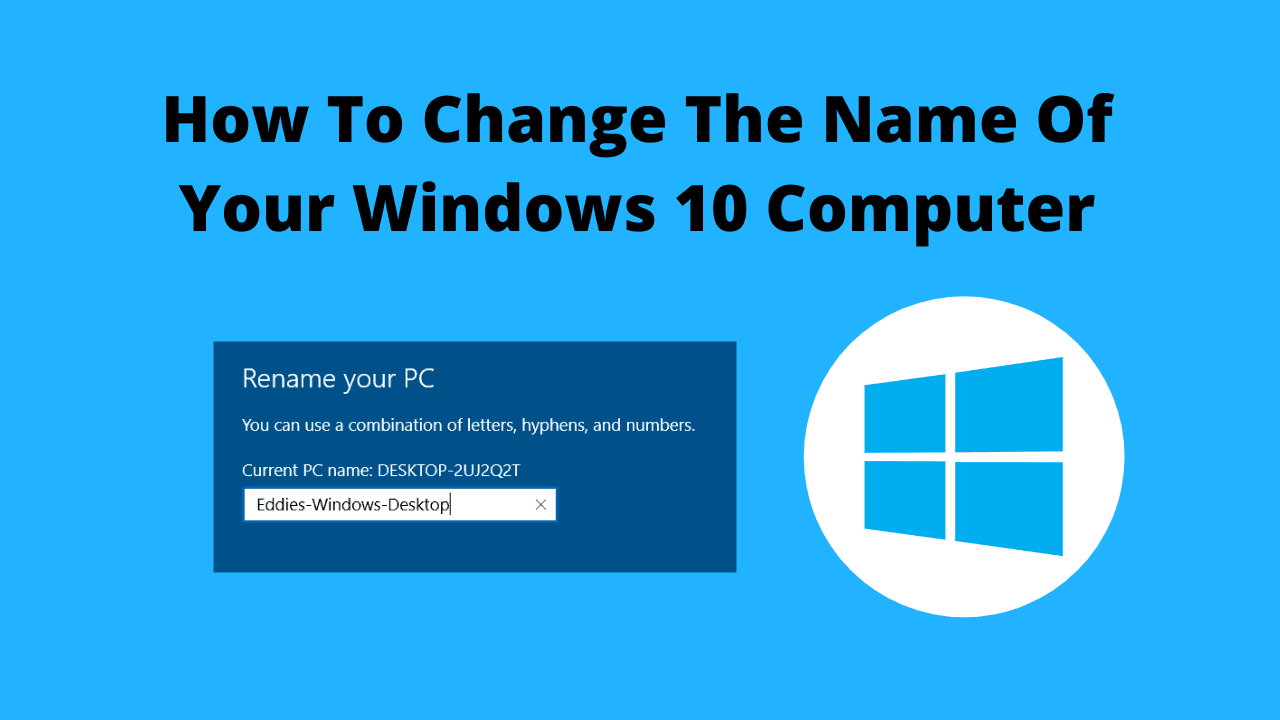
And then, a blue window will pop up with a box allowing you to type in whatever you want to name your computer.
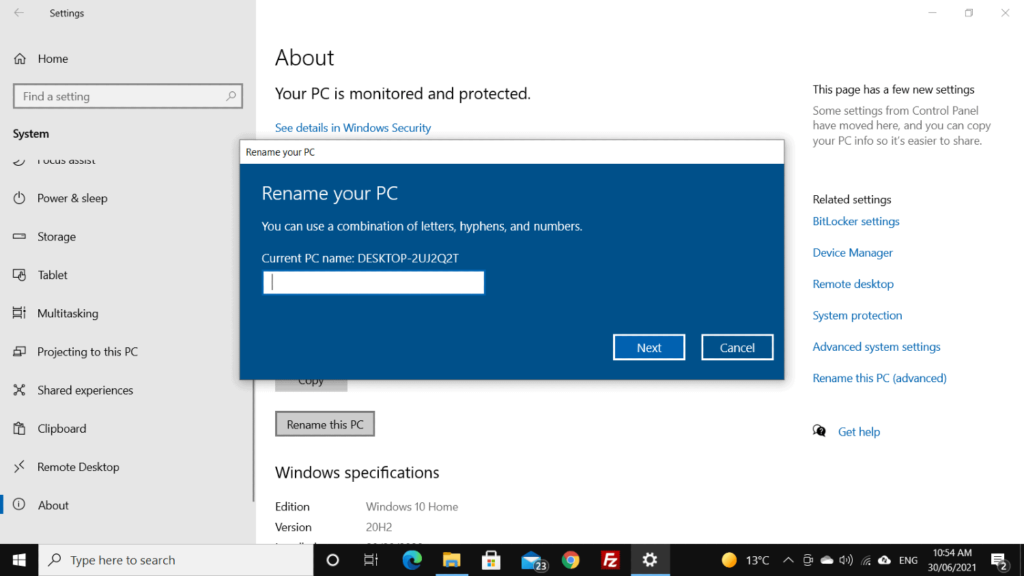
But keep in mind that you can only use letters, hyphens, and numbers in the name. This means you can’t use any spaces, punctuation, or any other symbols, which can be a bit restrictive.
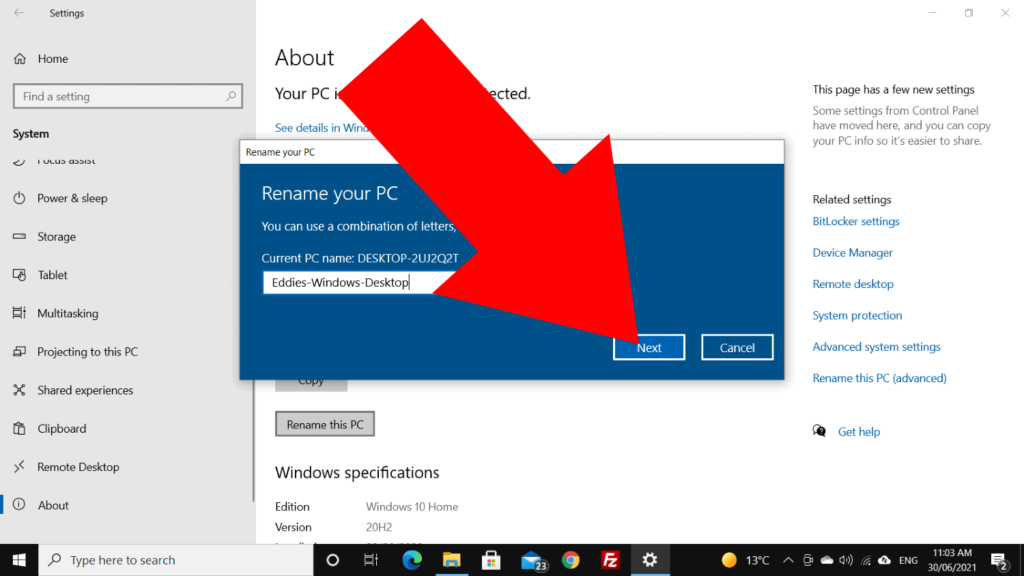
For example, I would like to name my computer “Eddie’s Windows Desktop“, but as that name has spaces and punctuation in it, I’ll have to settle for something like “Eddies-Windows-Desktop“.
But once you’ve decided on your name, you’ll just need to type it in this box and click “Next” when you’re done.
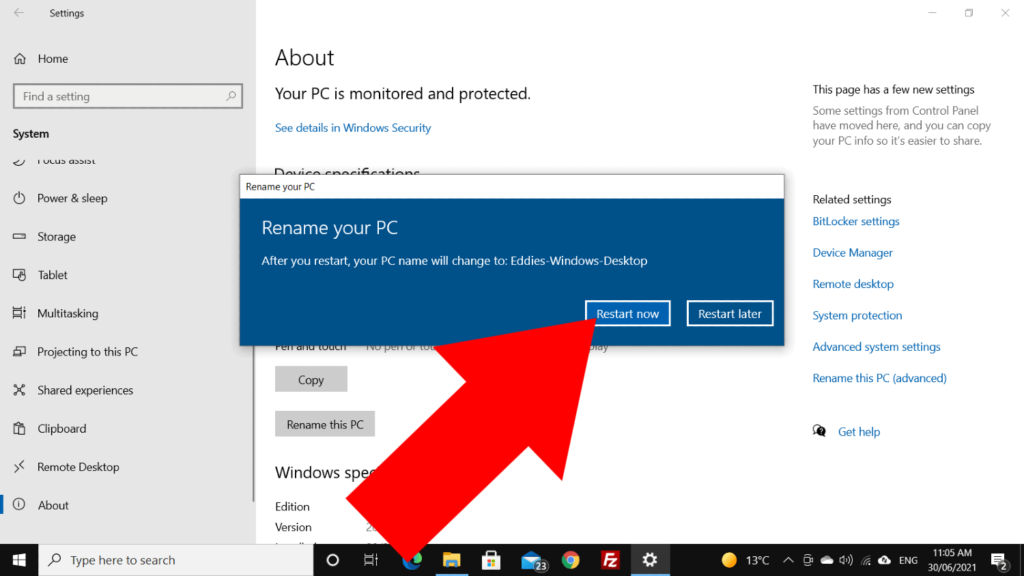
Once you click next, you’ll see this message telling you that the computer will be renamed after you restart it:
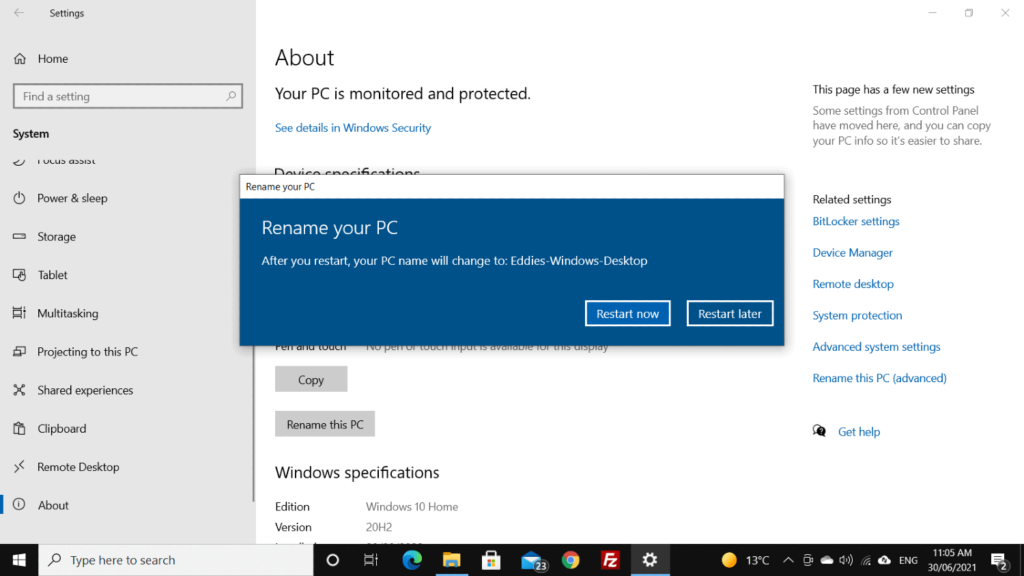
So, if you have any unsaved work on your computer, you’ll want to click “Restart later”, and then save your work and restart your computer when you’re ready.
Or, if you don’t have any unsaved work open, go ahead and click “Restart now” and your computer will restart.
And that’s all there is to it! It’s done! You just have to wait for your computer to restart, and when it comes back on, it will be renamed to the name you chose!
So now, if you go back into the “About” section of the settings app, you’ll see the name has changed!
Hopefully you found this tutorial helpful, and if you want more helpful Windows tutorials, you can take a look at all of them here.

