How to Make Transparent Objects in Cinema 4D (Step-by-Step)
Creating realistic materials and effects in 3D environments is a critical part of building engaging and dynamic scenes. One of the most visually dramatic material types is transparency, often used for objects like glass, plastic, or water. In Cinema 4D, transparency adds depth and realism when used correctly. This guide walks through all the steps to create transparent objects in Cinema 4D, even if you’re a beginner.
TLDR:
To make transparent objects in Cinema 4D, create a new material and enable the transparency and reflectance channels. Adjust parameters like refraction and brightness to suit your scene. Apply the material to your object and tweak lighting for the most realistic look. Render settings also play a vital role—be sure global illumination and refraction depths are set properly for best results.
Step-by-Step Guide to Making Transparent Objects in Cinema 4D
Table of Contents
1. Create a New Material
The first step to having a transparent object is to create a new material in the Material Manager. This is where the appearance of your object is defined.
- Go to Create > New Material.
- A new material will appear in the Material Manager. Double-click it to open the Material Editor.
2. Enable Transparency
To make the material transparent, you’ll need to activate the transparency feature in the Material Editor.
- In the Material Editor window, check the box labeled Transparency.
- Go to the Transparency tab to start adjusting settings.
You will immediately notice that your object begins to look less solid—this is the material’s transparency being applied in real time in the viewport.
3. Adjust Transparency Parameters
This is the core of achieving the right kind of transparency for your material. The important parameters to tweak include:
- Refraction: Controls how the light bends through your object (like how a straw looks bent in water). Set between 1.0 and 1.6 for glass, 1.3 for water.
- Brightness: Adjusts how transparent the object is. For fully clear glass, turn this up to 100%.
- Color: Optional, adds a tint to the transparent material if needed (like green-tinted glass).
Always preview in the viewport or by doing test renders to ensure it behaves as you expect.
4. Enable and Configure Reflectance
Transparent materials often also reflect light. This adds realism, especially for glass or polished plastics.
- Enable the Reflectance channel in your material.
- By default, Cinema 4D may add a Specular layer—delete it and add a Beckmann or GGX reflection layer instead.
- Adjust Reflection Strength and Fresnel (set to Dielectric and choose appropriate IOR).
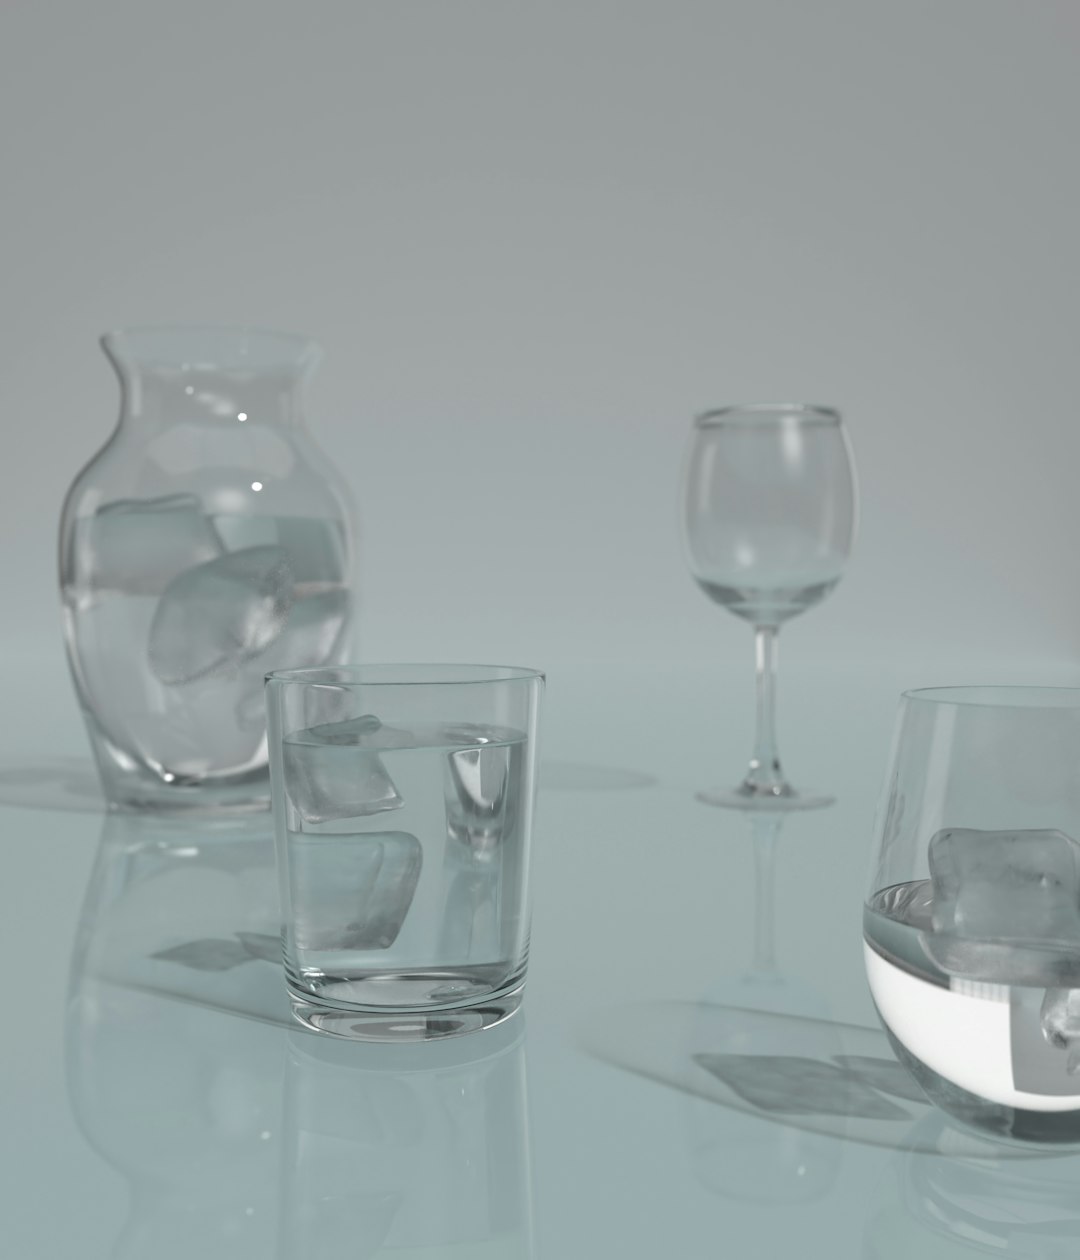
To simulate realistic glass, leave a subtle reflection and keep the transparency strong. Don’t overdo both as it will look unnatural.
5. Apply Your Material to the Object
Once your material is configured, the next step is simple:
- Drag and drop the material onto your 3D object in the viewport or Object Manager.
You should now see immediate feedback in the viewport, although for best results, a render preview will give you a more accurate sense of final output.
6. Light the Scene Properly
Transparent materials react heavily to lighting. Good lighting setup is essential to see the translucent qualities of your object.
- Use area lights or HDRI images for ambient lighting.
- Adjust the position and intensity of your lights to highlight the refractions and reflections.
Consider using Global Illumination in your render settings to get photo-real lighting though this will increase render time.
7. Increase Render Settings for Transparency
To visualize transparent objects properly, your render settings matter significantly. Transparency relies heavily on depth calculations and lighting, so configure your renderer as follows:
- Open Render Settings (Ctrl+B).
- Go to the Options tab. Increase Refraction Depth (8–12 for complex glass).
- Turn on Global Illumination under the Effect tab.
- Consider also enabling Ambient Occlusion to add depth to shadows.
Rendering transparent objects may take longer, especially with high-quality settings. Testing with low-res previews can save time until you fine-tune everything.
8. Add Surface Imperfections (Optional)
If your material is too clean, it may look unrealistic. Smudges, scratches, and fingerprints can make the material believable and lifelike.
- Add a texture map to the Bump or Normal channel.
- Use surface imperfection maps available from texture sites or create your own in image editing software.
This step is commonly used in product visualization and architectural rendering to avoid that “too perfect” CGI look.
Tips for Improving Transparent Materials
- Use thin geometry: Double-sided or thick geometry can distort transparency—model your object with realistic thickness.
- Check normals: Make sure the normals of your object face the correct direction or transparency won’t behave right.
- Shadow settings: Transparent objects sometimes cast unrealistic shadows—enable Transparent Shadows in your light options.
Exporting Transparent Renders
If you want your final render to have transparency (like a glass object on a transparent background), be sure to set your output settings properly:
- In Render Settings, go to Save.
- Choose a format that supports alpha channels (e.g., PNG, TIFF).
- Enable Alpha Channel and Straight Alpha if necessary.
FAQ: Transparent Objects in Cinema 4D
Q: Why is my transparent material showing up as solid in renders?
A: Make sure the Transparency channel is enabled and set correctly. Also check that the Refraction Depth in Render Settings is not set too low.
Q: How can I make colored transparent materials like tinted glass?
A: In the Transparency tab of your material, change the color value. A light blue or green can simulate tinted car windows or glass bottles.
Q: My render times increased dramatically after adding transparency. Why?
A: Transparent materials require complex light calculations, especially with global illumination and reflection enabled. Use lower preview settings while working and increase only for final render.
Q: Can I animate the transparency over time?
A: Yes. You can keyframe the Brightness value in the Transparency channel by clicking the dot next to it and adjusting over your timeline.
Q: Can transparent objects have shadows?
A: Yes, but make sure the light source has Transparent Shadows turned on. Otherwise, the object might cast a solid black shadow.
Creating transparent materials in Cinema 4D is both an art and a science. With the proper material settings, lighting, and rendering configurations, it’s possible to achieve breathtaking, realistic transparent effects that elevate any scene or animation.